Decorative hook rack

I don’t pretend for a minute that this is expert floral painting, but I like the way this turned out. I wanted to make a decorative hook rack to display a couple of infant christening dresses. This project cost me all of $1.76 for the two hooks – everything else, including all the paint, was on-hand. (It’s not mounted to the wall yet – it’s just leaning on my cabinet knobs to have its picture taken! LOL)

Decorative hook rack | Vintage Floral Cottage

I started with a 1×3 and cut it to 18 inches in length, then sanded the surface and edges just a little. I was going to make it distressed white, but I didn’t have enough white paint left. So, instead I sprayed the whole piece on all sides with a soft green.

I then used my acrylic paints to do the floral bits – I do NOT have the “composition gene” when it comes to this, so I just plopped them down wherever they seemed to be needed.

Decorative hook rack | Vintage Floral Cottage

When the decorative paint was dry, I brushed the whole front with a layer of clear-drying matte Mod Podge (didn’t have any spray sealer on hand), then screwed in the two hooks.

Decorative hook rack | Vintage Floral Cottage

There are a few flaws/imperfections in the construction and materials as well as the paint job, but, I’m not complaining. Overall I really like it!

Decorative hook rack | Vintage Floral Cottage

Now to get it mounted to the wall… I probably should have thought about that BEFORE screwing in the hooks! LOL *sigh* Just another day in paradise!

Posted in DIY & Crafts | 7 Comments

God’s gift

(Update 2017: This post was written when I lived in a previous home. I no longer have the fruit trees, but it is easy enough to create little habitats that welcome certain animals and other critters.)

We’ve got two fruit trees in our front yard, one apple and one pear (and a second apple tree in the sideyard); this year, we are having a bumper crop, though the pears are not yet ripe. This morning I saw two young deer enjoying what had fallen to the ground. (This is a tad remarkable considering that we live in the city.) I had been thinking about trying to make some apple butter, so I decided I’d better get out there and pick some fruit before it was too late.

God's Gift | Vintage Floral Cottage

As I spent time under the trees, it occurred to me that they really are quite a gift, and as I collected a tub full of apples I thought about the many benefits of the trees and their fruit. In the Spring, they bloom profusely and are quite simply stunning. I wish I had thought to snap a photo at that time! They also provide a home – this nest had robins in it earlier in the year.

God's Gift | Vintage Floral Cottage

Under their canopy, they offer shade and opportunities to quietly observe. They’re also quite the gathering place, for sunning or feeding.

God's Gift | Vintage Floral Cottage

As the fruit matures, some of it falls to the ground before it’s ripe. The deer aren’t the only ones who enjoy it – it quickly begins to ferment and the bees and wasps cannot resist it. Since part of the pear tree hangs over the driveway, we have to quite literally shovel the smashed (run over) fruit back into the yard so we can get in and out of our cars without disturbing our stinger-bearing friends.

God's Gift | Vintage Floral Cottage

Finally it’s time for we humans to enjoy the bounty. I’d been leery of using the fruit since we hadn’t sprayed it with anything all year – most of the apples have dark spots covering them. I quickly learned, however, that this is a surface fungus. I washed and rubbed a few of them clean, and took a bite – they are wonderfully tart and a little sweet. I’m not certain, but I think they are Honeycrisp.

God's Gift | Vintage Floral Cottage

And speaking of ‘crisp,’ that’s just what I made tonight, from apples picked fresh from the yard. Funny how the day led me to some really good apple crisp (recipe below) – and plenty of apples left over to make butter!

God's Gift | Vintage Floral Cottage


Easy Apple Crisp:

1 cup brown sugar
1 cup rolled or quick oats
1 cup flour
1/2 cup butter, melted
3 cups of apples, peeled, cored and chopped
1/2 cup white sugar
2 tsp ground cinnamon

Preheat oven to 350F. Lightly grease 8 inch square baking pan. In a large bowl, combine brown sugar, oats, flour and butter.. Mix until crumbly. Place half of the crumb mixture in the pan and spread evenly around the bottom. Spread the apples evenly over the crumb mixture. Sprinkle apples with sugar and cinnamon, then top with remaining crumb mixture. Bake in the pre-heated oven about 45 minutes or til golden brown.


Posted in Gardening | 7 Comments

How to make Sablé (butter cookies)

Sable | Vintage Floral CottageAwhile back I was enjoying a tin of plain old “butter cookies” and wondered if they were easy to make. I did a little searching, and quickly came up with a recipe for sablé.

Sablé is a very basic recipe that can be amended in innumerable ways, but at its core it’s essentially a butter cookie with a very crumbly, “sandy” texture. (The word “sandy” in cookies refers to the degree to which they crumble in your mouth – if you do sablé right, when you press one against the roof of your mouth, it practically dissolves in fine-crumbed perfection.)

The recipe I have is based on proportion rather than measurement. For simplicity’s sake, I’ve decided that “one part” equals a half-cup. So, “two parts butter” is one cup of butter, “one part sugar” is a half-cup of sugar, and “four parts flour” is two cups of flour. This makes it easy to halve the recipe for a smaller batch: half-cup butter, quarter-cup sugar, 1 cup flour. For salt, a pinch is still a pinch. (And I always seem to forget the salt!)

Having made this recipe several times, I’ve been wanting to try some variations. Certainly you could mix in some cinnamon or nuts, but “dipped in chocolate” always seemed like a good idea too. And something lemony. So today I made a small test-batch, divided it into thirds, and then experimented with the lemon and chocolate variations.

For the lemon cookies, I added a couple teaspoons of lemon zest to one third of the dough and then made up a small batch of lemon cream-cheese frosting. Once my cookies were baked and cooled, I simply frosted them and let the frosting firm up a little.

For the chocolate version, I made up some “sort-of ganache”. I spread some like frosting, and also tried drizzling it over some of the cookies. It does firm up, making a glossy chocolate coating.

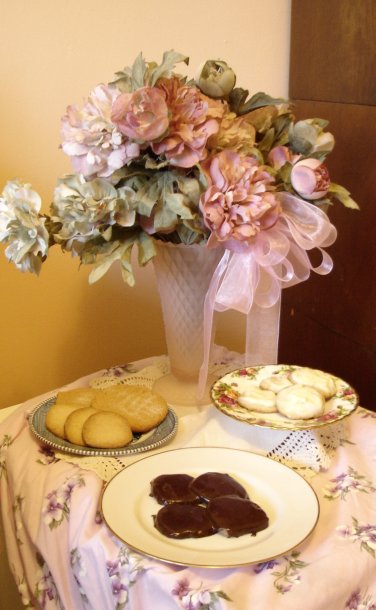
Both of these – and also the plain sablé – are superbly wonderful. They would be lovely accompaniments with lemonade, coffee or tea.

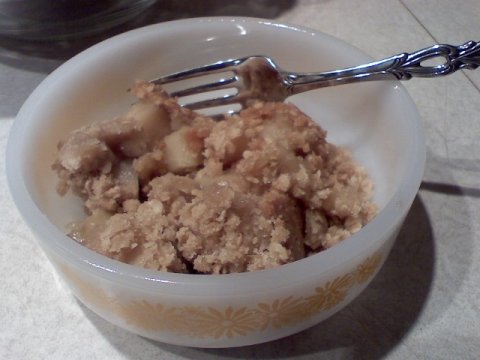
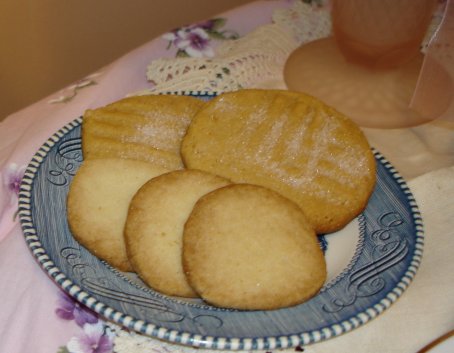
Here are the plain sablé cookies, along with a couple peanut butter cookies just for my hubby:

Sable | Vintage Floral Cottage

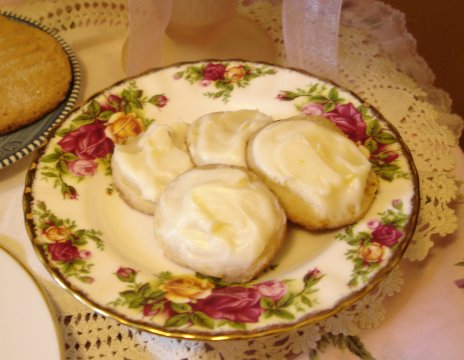
Next we have the lemon-frosted – I also put lemon zest in the cookie dough. These were my favorites!

Sable | Vintage Floral Cottage

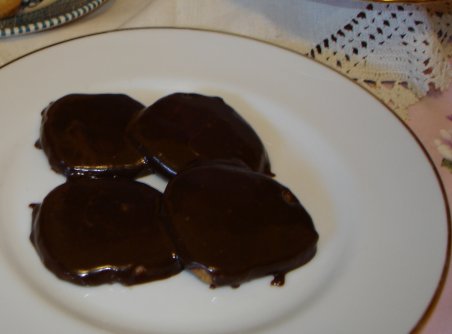
And finally, the “sort-of ganache”-covered Sablé – the ones that I merely frosted with the ganache were very good; the coated ones were a bit over-powered by the ganache. Probably chocolate “almond bark” would work as well for a milk-chocolate coating.

Sable | Vintage Floral Cottage

Sablé (Butter Cookies)

2 parts butter
1 part sugar
4 parts flour
Pinch salt

Combine butter, sugar, and pinch of salt in large bowl; add flour a little at a time, blending completely. When well-blended, form dough into a log about 1-1/2 inches in diameter. Wrap in plastic wrap, and chill in refrigerator for at least 30 minutes.

Preheat oven to 350F. Remove chilled dough and cut into slices about 1/8 inch thick. Arrange on cookie sheet. Bake 8-10 minutes, watching carefully for signs of over-browning. Remove to cooling rack.

Posted in Recipes | 2 Comments

Quick, cute centerpieces

Here’s a super-quick idea I created back in December. I needed centerpieces for the banquet tables for a local Harley Owners Group (HOG) Christmas party. The party theme was “Hoe-down,” and the audience was motorcycle enthusiasts. Here are the materials I used, no more than $1 for each item:

Small glass container
Florist foam block
1 stem silk flowers
1 Bandana
1 fistful of craft raffia

Quick cute centerpiece | Vintage Floral Cottage

Starting with a small glass candle jar and “country-looking” silk flowers, I first pushed a chunk of florist’s foam down into each jar. (You can hot-glue it if you like; I left mine loose because I wanted the flowers to be removable.) I separated the blooms on their stems from each bunch of flowers and arranged them in the foam so they created a nice “poof” over the top of the container:

Quick cute centerpiece | Vintage Floral Cottage

To decorate the jar, I wrapped each one in a brightly-colored bandana. This fit right in with the barn-dance theme, and bikers use them all the time as head coverings. I folded the corners of each bandana in so it made a smaller square:

Quick cute centerpiece | Vintage Floral Cottage
Then, I gathered the folded bandana up around the jar and tied it together using a couple lengths of raffia.

Quick cute centerpiece | Vintage Floral Cottage

The result was a cute, quick centerpiece that fit the theme. And, when we gave them away at the end of the evening, 22 bikers each got a new bandana out of the deal!
“Turkey in the Straw,” anyone?

Quick cute centerpiece | Vintage Floral Cottage

Posted in DIY & Crafts | 2 Comments

Monkey see, monkey paint

First of all, just in case there was any doubt that my cat actually likes the romantic office desk makeover featured in my previous post, here’s the evidence:

Sleeping cat | Vintage Floral Cottage

Side note: he SNORES!

For today’s post I thought I would go out on a limb and share some of my “art.” I don’t make any claims to being an artist. From piano lessons to desktop publishing and everything in between, I consider myself a bit of a trained monkey (and I mean that in the nicest possible way – “monkey see, monkey do, sometimes with passable results!”).

One of the artistic endeavors that I’ve practiced quite a bit is the art of decorative painting. While I have never been able to re-create to my complete satisfaction the designs and strokes of published teachers such as Priscilla Hauser and Donna Dewberry, I’ve nonetheless been pleased enough with my results that I actually painted a variety of items one year as Christmas gifts – which means that I was for once not entirely horrified by my own efforts – and those items actually saw the light of day in someone else’s home.

Here are a few samples of my many painting projects, starting with one of my favorites – a brag book/photo album with roses and greenery:

Painting projects | Vintage Floral Cottage

Romantic Christmas ornaments (given to a complete stranger in an ornament swap!):

Painting projects | Vintage Floral Cottage

Another photo album, this time with geraniums and hand-painted calligraphy:

Painting projects | Vintage Floral Cottage

Glass creamer painted with lilacs and filled with hand-poured soy wax candle:

Painting projects | Vintage Floral Cottage

A curb-find cabinet that I painted pink, embellished, and then hung on my old patio, pre-flood:

Painting projects | Vintage Floral Cottage

Tableware caddy painted with cherries and given to my mother-in-law:

Painting projects | Vintage Floral Cottage

I haven’t painted since we moved to our new house, but I DID rescue my rack of craft paints so I really have no excuse. One thing I lost, though: my original sketchbook full of practice strokes and pictures, which I lovingly called “Bad Art.” Here are a couple of surviving images I had scanned out of it for other uses before it was destroyed – a “signature” graphic I used in an online forum with magnolias and my username, “Janetgia”; and below it, a baby robin I painted, then scanned and used as an avatar in another forum:

Painting projects | Vintage Floral Cottage

Painting projects | Vintage Floral Cottage

I’ve certainly got to spend some time practicing my skills before I feel confident enough to give something away again!

Have you ever tried tole, One Stroke, or any other type of decorative painting? What did you think of the results?

Posted in DIY & Crafts | 4 Comments