Vintage pillowcase toss pillow – with how-to!

Update: I’m sharing this project over at Sew Cute Tuesday on Misty’s lovely blog, Creative Itch. Please click through to see lots of wonderful ideas!

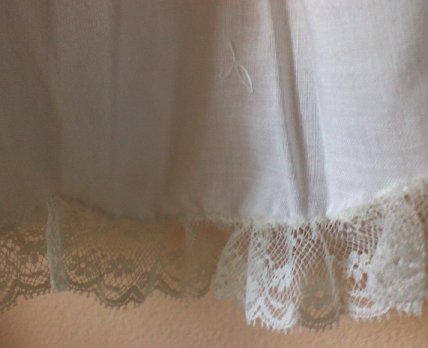
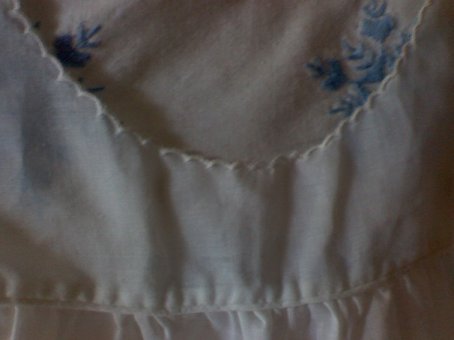
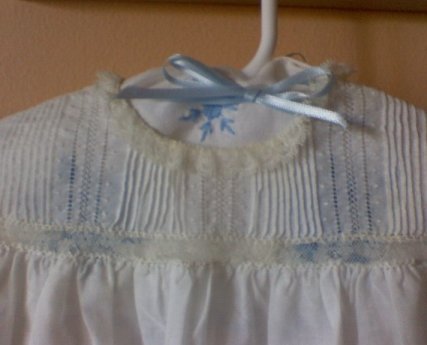
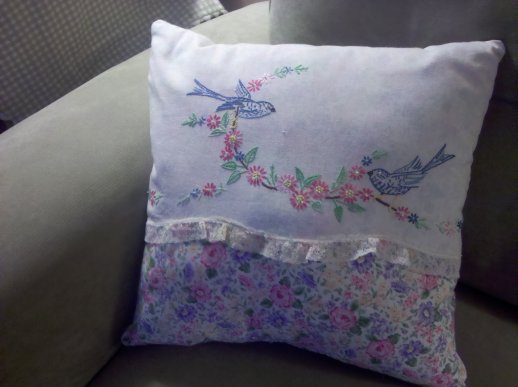
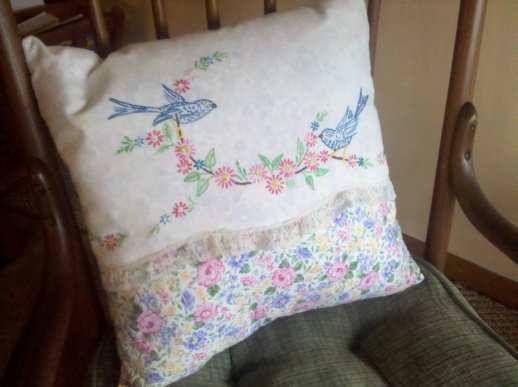
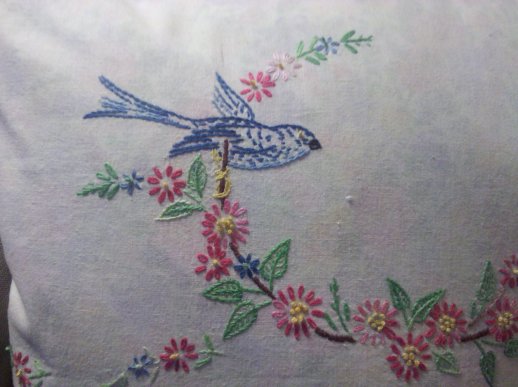
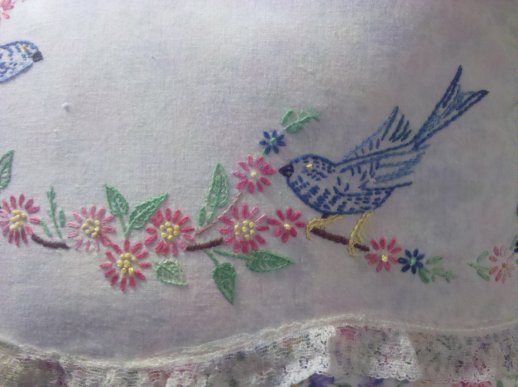
I recently conjured up the idea for this pretty toss pillow, when I was looking for a way to use the embroidery on an old cotton pillowcase my great-grandmother had worked. (You can see how I’ve used a few more of her pillow cases here and here.)

The fabric of this pillowcase was damaged, but I wanted to preserve the embroidery. My idea was to create a sort of “flap” over a coordinating fabric for the front, with a plain panel on the back. I originally envisioned some lace all around the pillow, but by the time I got around to sewing this project I couldn’t find where I had stored the lace I had purchased. (Not surprisingly, I found it shortly after finishing the project!)

First, here’s the finished toss pillow:

Embroidered Toss Pillow | Vintage Floral Cottage


And, here’s how I made it.

1. The size of the pillow is determined by the width of the pillow case. A 16-inch pillow form was a little bit too big, but I made it work by removing a little of the fiberfill. I cut squares for the front and back fabric panels a little larger than 16 inches to allow for seams.

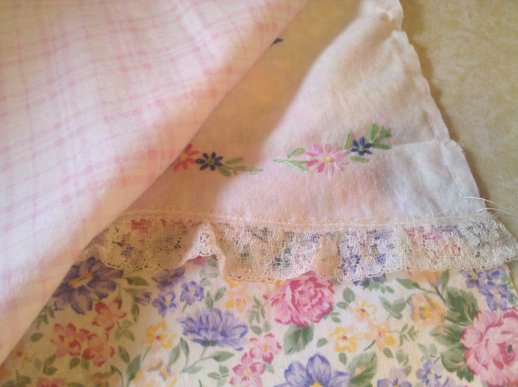
2. I cut the panel from the pillow case so that it would end up being about two-thirds the length of the front panel.

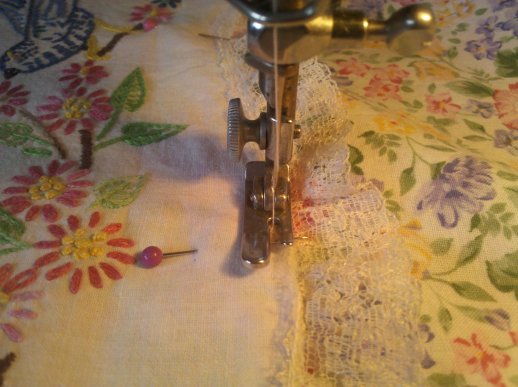
3. I pinned the pillow case to the front side of the front panel. I stitched these two pieces together along the lace edge of the pillowcase so I would not end up with a “pocket” on the front. I also tacked the other three sides of the pillowcase to the front panel with a quarter-inch seam using long basting stitches.


Embroidered Toss Pillow | Vintage Floral Cottage

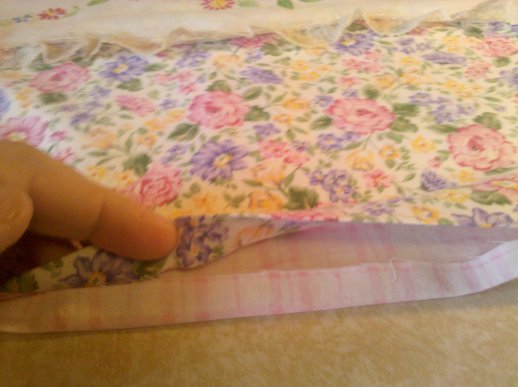
4. Next I pinned the assembled front panel to the plain back panel, right sides together. I stitched the two panels together with about a half-inch seam allowance on all sides, but left an opening at the bottom about eight inches long so I could insert the pillow form.


Embroidered Toss Pillow | Vintage Floral Cottage

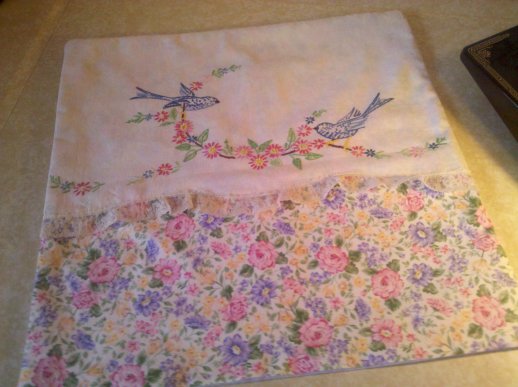
5. I turned the whole piece right-sides out. The edges of the opening naturally wanted to fold to the inside, and I pressed them down. Here’s the finished pillow before stuffing.

Embroidered Toss Pillow | Vintage Floral Cottage

Embroidered Toss Pillow | Vintage Floral Cottage


6. I stuffed the pillow using the 16-inch form I had purchased, but because my finished cover was a little under 16 inches, I had to remove a little of the stuffing to make it fit. Fortunately this was a zippered pillow form so I was able to shove that stuffing back in after I got the form inside the cover.

7. I pinned the folded edges of the opening together and whip-stitched them shut, then fluffed and squeezed the stuffing around til the pillow was nicely filled out.

Voila! A very sweet cottage-ready toss pillow full of vintagey goodness, with a little family history behind it!

Embroidered Toss Pillow | Vintage Floral Cottage

Embroidered Toss Pillow | Vintage Floral Cottage

Embroidered Toss Pillow | Vintage Floral Cottage

Embroidered Toss Pillow | Vintage Floral Cottage

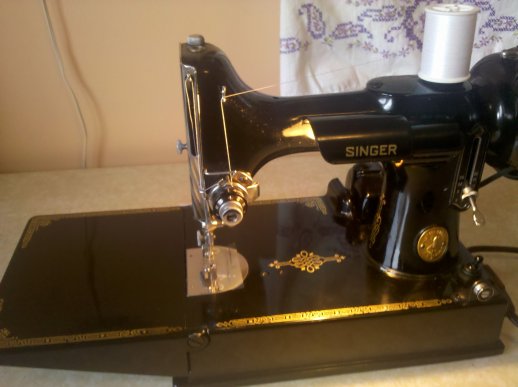
Oh! And, just in case this isn’t enough ‘vintage” for you, below is what I’m using for a sewing machine these days: my grandmother Helen’s Singer Featherweight 221-1! I love the machine for its indestructibility, its simplicity, and of course its vintage design. This one is from the late 40’s, I think.

Vintge Singer Sewing Machine | Vintage Floral Cottage


Posted in Decorating | Leave a comment

Pink Spring Table

Spring has sprung (finally!) and I’ve been eager to set a small luncheon table to celebrate. Let me give you a tour of the table before we enjoy our lunch!

First, you can see that our dining spot is situated at one of my favorite spots in the house: next to the large bay of living room windows. I’ve set the table with an emphasis on pink and Spring.

Pink Spring Table | Vintage Floral Cottage

Here’s your seat – you can watch the robins hopping around on the lawn by looking out the window to your left. We’ll be using these first pretty plates for dessert, so we can move them off to your right while we enjoy our salad. I don’t know the name of this pattern, but I love the creamy white background, gold edging, and pretty roses. (Update March, 2014: I discovered that the rose plates are called “Summer Rose” by Taylor-Smith-Taylor!)

Pink Spring Table | Vintage Floral Cottage

Our salad plate is a soft yellow. The wide rim and pastel colors remind me a lot of a vintage brand called LuRay, but these are marked “MSE – Microwave and dishwasher safe.” A moments’ research revealed that MSE means Martha Stewart Everyday, so the fact that I got a pristine set of 2 dinner plates and two salad/lunch plates at the Goodwill, for a grand total of $2.99, makes me very happy!

Pink Spring Table | Vintage Floral Cottage

At the bottom of the stack, our entree will be enjoyed on beautiful Homer Laughlin Glenwood. I acquired these plates through Ebay; the other two plates shown above were Goodwill finds.

Pink Spring Table | Vintage Floral Cottage

Our beverage mugs are mis-matched, but they are from the same series. Your mug echoes the pale yellow of the salad plates…

Pink Spring Table | Vintage Floral Cottage

…and mine repeats the pink theme around the table. I have a third mug in this series, too – together they are one of my favorite sets, and I don’t even drink coffee!

Pink Spring Table | Vintage Floral Cottage

Here you’ll find we are again using my Oneida Chandelier stainless flatware – believe it or not, this is the only set of flatware I own! It was a long-ago gift from my Aunt, and I’ve decided there’s no sense in saving it for special occasions – I love to use it every day! You can also get a much better view of the pattern on our vintage tablecloth – very Springy!

Pink Spring Table | Vintage Floral Cottage

Feel free to pluck a pink napkin from this scrolly heart, another Goodwill treasure…

Pink Spring Table | Vintage Floral Cottage

…and shoo away this visitor if you wish, she is only here to watch the birds!

Pink Spring Table | Vintage Floral Cottage

Here’s the view from my side of the table.

Pink Spring Table | Vintage Floral Cottage

I’ll be happy to pass you the salt in this pretty pink Depression Glass shaker. (Sorry, no pepper with this meal as I don’t have any kind of shaker that complements this one!)

Pink Spring Table | Vintage Floral Cottage

Oh! And I want you to meet our seatmates – our Spring-time friends Rob & Jay. Rob is a hand-painted Lefton figureine, and Jay hails from The Whitehall Society. Robins and Bluejays are among my favorite birds. Don’t they look right at home with the rustic white picket tops? (You might remember that I won those picket tops recently from Donna’s give-away over at Funky Junk Interiors! My little birdies love them!)

Pink Spring Table | Vintage Floral Cottage

Here’s a peek at our floral accompaniment – a vintage pink Diamond Point vase by Indiana Glass Co., filled with a simple silk stalk from elsewhere in the house.

Pink Spring Table | Vintage Floral Cottage

Finally, the table where we’re seated is extra special to me: it is an antique that sat in my grandparents’ home for decades, and I kept it after they both had passed away. I’ve included below a full view of the table without the covering and dishes.

Pink Spring Table | Vintage Floral Cottage

Now let’s enjoy our lunch and this beautiful Spring day!

Posted in Tablescapes | 7 Comments

Winnings, foldings, and meetings!

WOOHOO!! Now don’t get me wrong, I look in the mirror every day and tell myself, “Girl, you’re a WINNER!” Somehow it helps me get through the day. But today, I was a winner in another sense: I won part of the fab junk giveaway over at Funky Junk Interiors! I’ll soon be receiving a few of these wonderful “picket tops” from the legendary pallet desk! Can’t wait to have their chunky, faded, woody goodness in hand so I can figure out something fun to do with them!

Picket Coasters | Vintage Floral Cottage


In other junky news this week, I recently (finally!) joined the cloth napkin club by winning this delightful auction on Ebay – a set of four lively “Vera” napkins with a wonderful butterfly-and-foliage pattern! They are about 15 inches square – this photo doesn’t do justice to the colors, which are bright without being overblown or too neon-ish:


Spring napkins | Vintage Floral Cottage
Of course, I opened them up immediately upon receipt and tried out the artichoke napkin fold shown over at Between Naps on the Porch:

Napkin Fold | Vintage Floral Cottage

Looks lovely, can’t wait to set the table with them!

And finally, I wanted to be sure to mention the delightful lunch I had a couple of weeks ago with Beth from Food As Art! In reading her blog I had discovered that Beth and I have several favorite dinnerware patterns in common, and that she lived close by! We got together for lunch and had a great time chatting about her work, my work, her volunteering efforts (on behalf of animal shelters!), gardening, and of course – thrifting! Beth, it was sheer delight to meet you and I hope we can get together again soon!


Posted in Decorating | 3 Comments

Mail call: tin wall pocket made into a romantic Victorian style mail holder

Update 2018: Just a quick update on this post to show that yes, I am still using my sweet mail tin! In the past couple years I’ve acquired a few vintage postcards that I keep in the tin… and when I remember to do it, I swap them out for various holidays.

Mail tin with vintage Easter postcards | Vintage Floral Cottage

I’ve been on the lookout for a tin wall pocket to use as an outgoing mail caddy in my home office (because I really AM trying to write more letters!), and finally found something this week at Goodwill that would work (99 cents – hooray!):

Victorian style mail tin | Vintage Floral Cottage

Not a bad little piece (though it must have been “crooked day” at the tin-folding factory!), and even the finish had some depth to it.

To begin, I spray painted the tin piece white, then gathered some home-made paper elements (using graphics from The Graphics Fairy)…

Victorian style mail tin | Vintage Floral Cottage

…and some romantic adornments…

Victorian style mail tin | Vintage Floral Cottage

…and set about figuring out how everything should be used. I knew I wanted a label on the front, and also had the idea of incorporating some vintage postcards. (My “postcards” are only partials because I was having trouble with printer settings. I decided I could still get the look I wanted of having them tucked inside the pocket even if they weren’t full-size.) I first glued them together at a jaunty, “just tossed in” angle…

Victorian style mail tin | Vintage Floral Cottage

… then glued them into the inside back of the pocket.

Victorian style mail tin | Vintage Floral Cottage

I layered my pink ribbon and ivory rose by wiring them together, and further layered by tucking in the hanky as a backdrop for the ribbons.

Victorian style mail tin | Vintage Floral Cottage

Here’s a peek at the “Mail” label:

Victorian style mail tin | Vintage Floral Cottage

I actually tried several different arrangements of all these elements, and this was my favorite. So, here’s the finished piece, ready to hold my letters (or, more likely, bills)!

Victorian style mail tin | Vintage Floral Cottage

Update March 2013 – Just popping back in on this post to link it to a lovely blog linky party called “An Oldie But a Goodie” where you can see fabulous past projects! The party is co-hosted by Nancy at Do Small Things with Love and Jessica at Cutesy Crafts. Thanks to both of these wonderful gals for the opportunity to showcase an older project! 
Posted in Decorating, DIY & Crafts | 3 Comments

Vintage christening dresses

As a follow-up to Sunday evening’s post about the wall-hook rack that I painted, I thought I would just share a few pictures of the sweet little christening dresses that now hang from the hooks.

Christening dresses | Vintage Floral Cottage

I will need to look for some photographic evidence to confirm, but I believe that this would have been my own christening gown. (My older sister was born premature and it would have been way too big for her.) I think that the little piece on the right may actually be a slip, worn under the piece on the left, because it is sleeveless.

A few photos showing some of the details…


Christening dresses | Vintage Floral Cottage

Christening dresses | Vintage Floral Cottage

Christening dresses | Vintage Floral Cottage

I purchased these darling little hangers just for these dresses – hand-made embellishments on baby-sized plastic hangers. Very sweet!

Christening dresses | Vintage Floral Cottage


Posted in Decorating | 12 Comments