Custom dish storage cabinet

I seem to be able to hand Greg any crazy idea I have in mind, and he has the ability to build it “on the fly” without plans yet somehow immediately getting my vision for what I’m needing to build. Case in point: my farmhouse step-back cabinet – a beautiful piece in and of itself which I use to showcase some of my favorite Limoges, bone china, and ironstone pieces.

Now this week, he just completed another of my “big ideas” – weeks in the making because it took me so long to find just the right core elements, but completed in an evening because he just seems to know his way around a carpentry project.

Custom dish storage | Vintage Floral Cottage

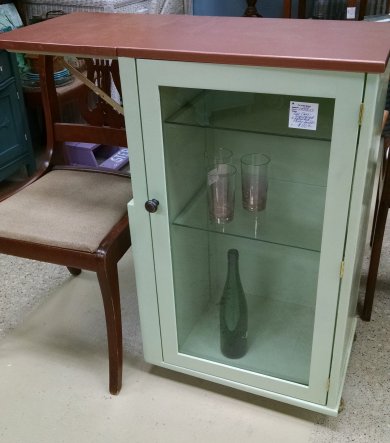
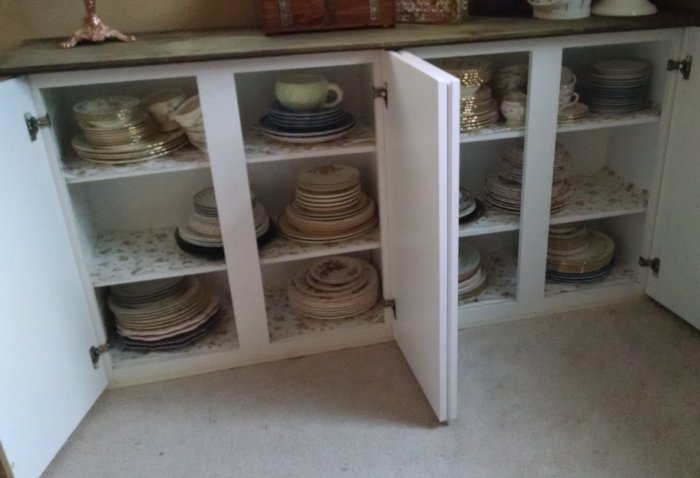
So the problem was, I needed storage space to house my growing collection of vintage dishes. My kitchen cupboards and the base cabinet of the hutch were full, plus I had some in the basement and some in my new curio cabinet and still more in my barrister bookcase. My solution/big idea was to find two gently used kitchen wall cabinets (because base cabinets would be too deep for the tiny room they were going into), and somehow join them together into one storage piece. Extra points if they were already white.

It took so long to find them, I started looking at other potential solutions: china cabinets, antique buffets, etc. But the china cabinets I was seeing just weren’t what I wanted, and the buffets all had too many drawers – I needed shelves!  Also, these types of pieces were out of my budget – I wanted to spend less than $100 on the whole project.

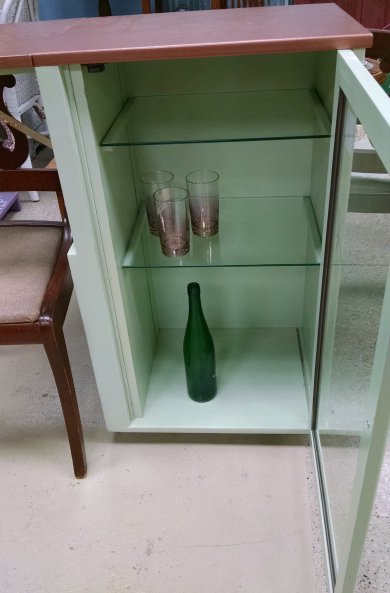
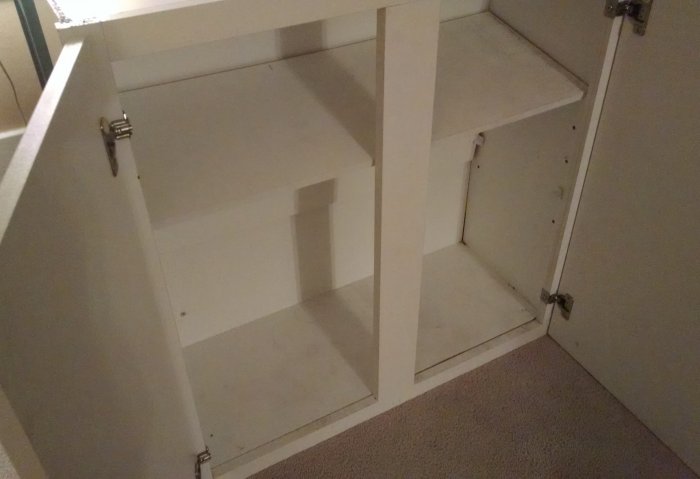
Finally after many weeks of looking, I stopped in for a second visit at the Habitat for Humanity ReStore in our area and – voila! – there they were!  Two matching kitchen uppers, 30 x 30 inches, two shelves each (plus the bottom shelf), already white, for $36 each. That is a $72 storage unit just waiting to happen!

Custom dish storage | Vintage Floral Cottage

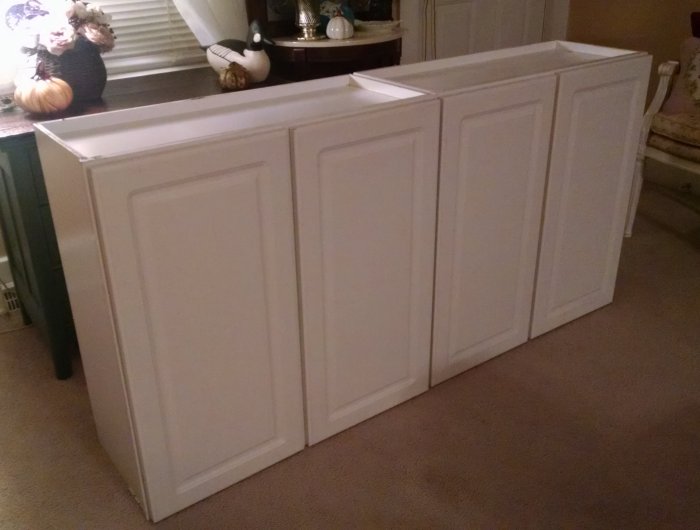
Two matching kitchen uppers, in my living room. Temporarily.

Custom dish storage | Vintage Floral Cottage

Custom dish storage | Vintage Floral Cottage

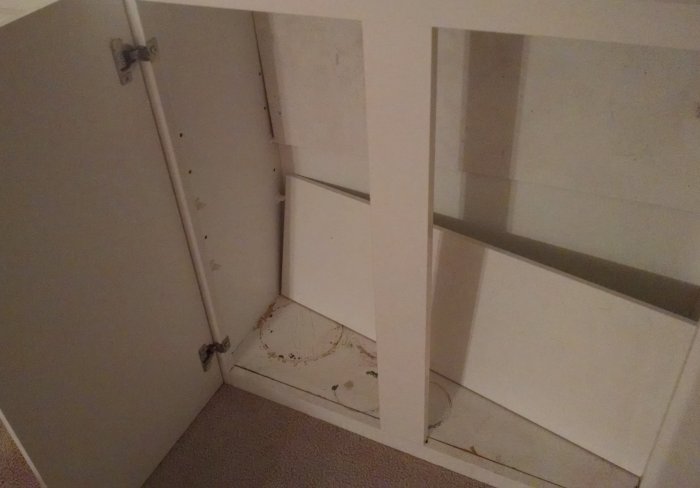
I had literally all the other elements of this project on hand: all the scrap lumber Greg used to strengthen the tops and bottoms of each cabinet…

Custom dish storage | Vintage Floral Cottage

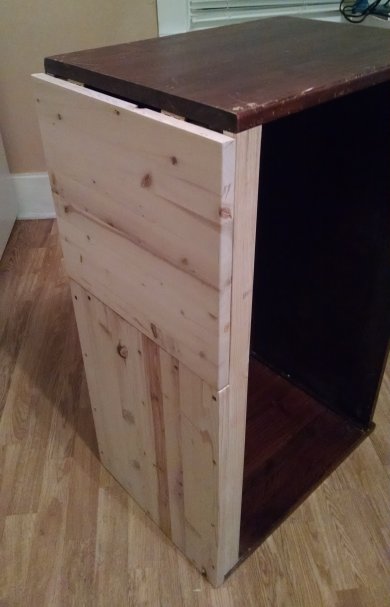
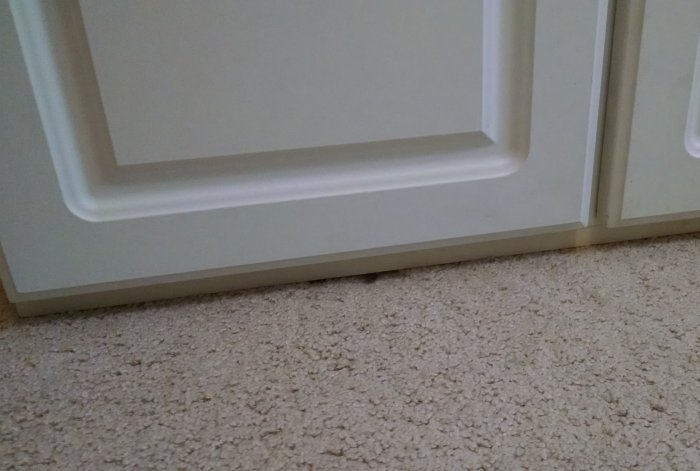
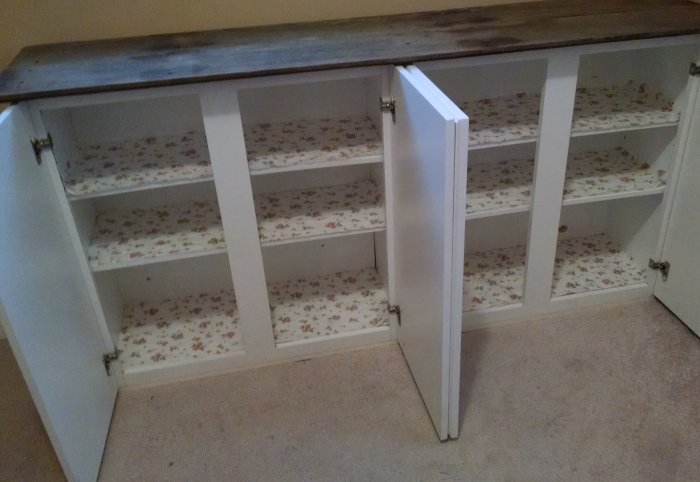
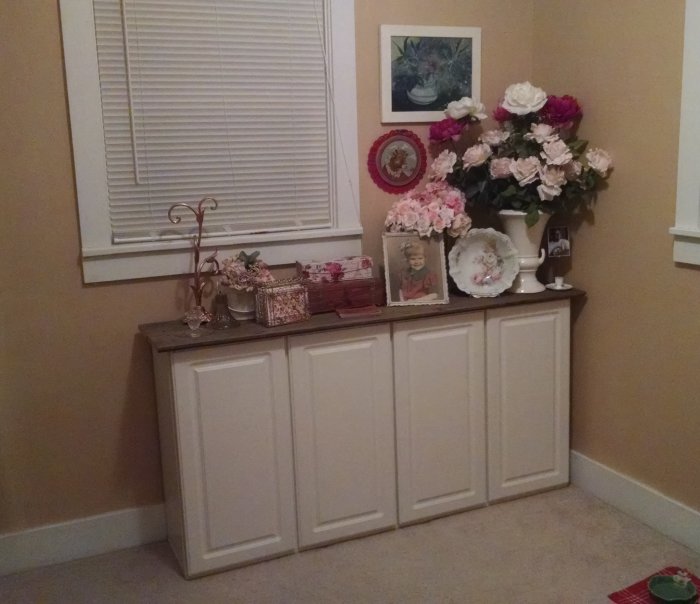
A lone piece of white laminate shelving that he cut to fit as a base to help join the pieces together, which gave it strength but also raised it up just a skosh so the doors don’t drag on the carpet…

Custom dish storage | Vintage Floral Cottage

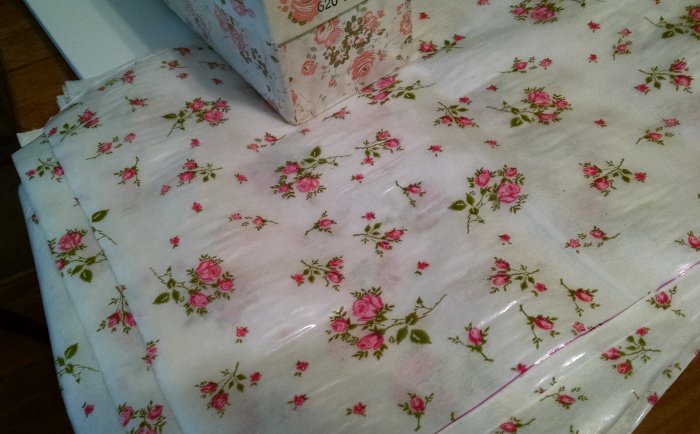
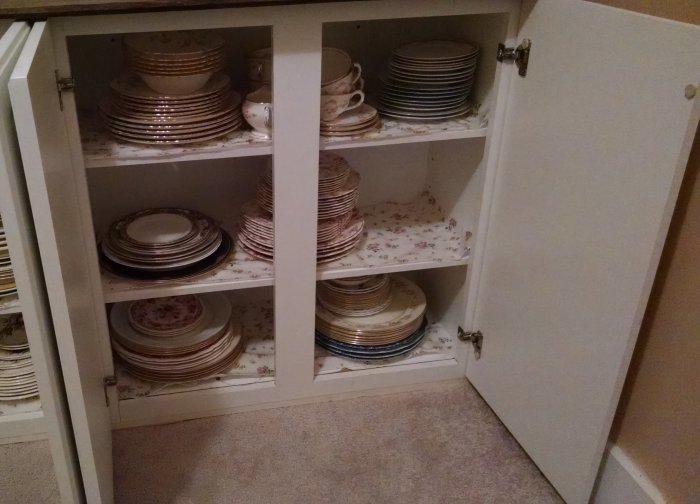
The pretty rose-scented drawer liner that I cut for each of the shelves…

Custom dish storage | Vintage Floral Cottage

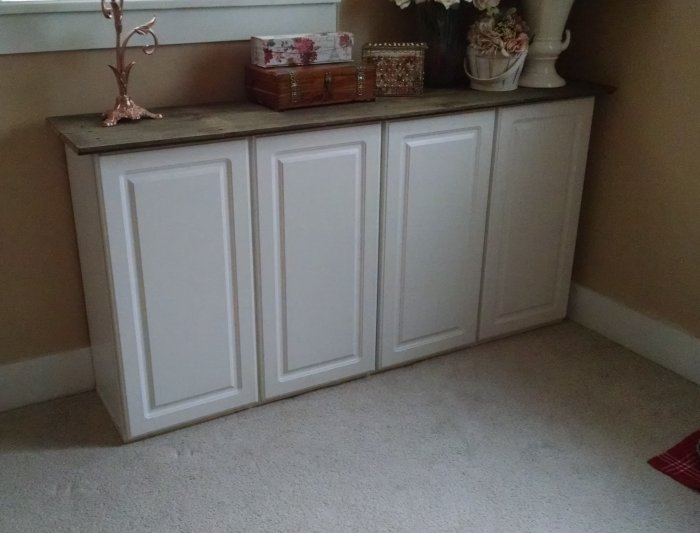
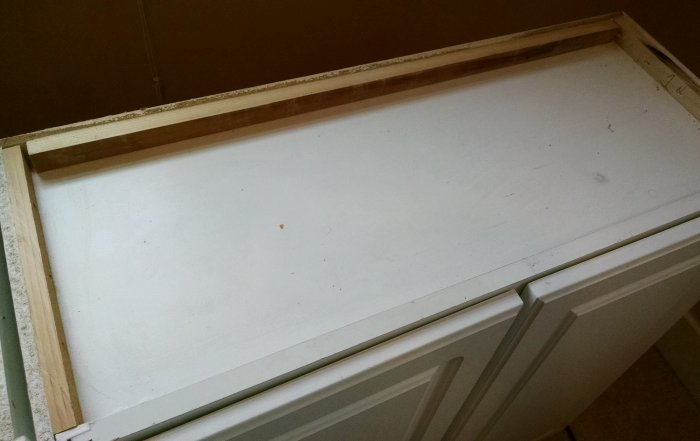
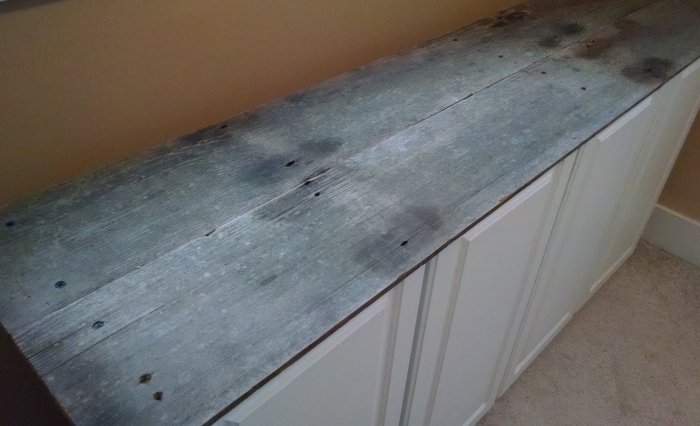
And even the two pieces of vintage carsiding that we used for the top.

Custom dish storage | Vintage Floral Cottage

Custom dish storage | Vintage Floral Cottage

Also on hand: two little silverfish who tried to hitch a ride from the garage into the house, so I sprayed all the vintage nail holes with Raid. Those damp spots are slowly drying out. Sorry bugs…

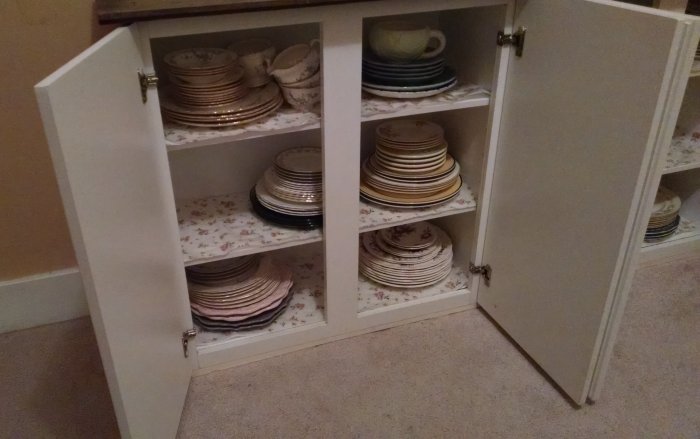
Well as you can guess, I have already lightened the load in my kitchen cabinets by moving lots of pieces into this new unit. I tried to leave a little room for expansion, but I’m afraid I’m just going to need another one of these real soon.

Custom dish storage | Vintage Floral Cottage

Custom dish storage | Vintage Floral Cottage

Custom dish storage | Vintage Floral Cottage

Custom dish storage | Vintage Floral Cottage

Custom dish storage | Vintage Floral Cottage


I’m sharing my custom cabinet over at FunkyJunkInteriors.net for the DIY Salvaged Junk Project party!

Posted in DIY & Crafts | 4 Comments

DIY bar cart from bookcase section

We’ve had a few successes with repurposing projects – cast-off items we purchased and then transformed into something different and useful. (Remember our Beachy Federalist coat rack?) By far our mutual favorite is what we simply call our DIY bar cart, which started life as one section of a barrister bookcase.

DIY bar cart from bookcase | Vintage Floral Cottage
We found the section at Goodwill – normally it would sit horizontally and be stacked on top of other identical sections – and quickly re-envisioned it as a bar cart. So we got to work designing, and came up with the general idea that it would sit vertically, with a hinged shelf that would pop up, and shelving inside for bar supplies, glassware, and liquor bottles.

Engineering these elements was interesting… Greg handled the problem-solving in this phase, based on my design.

DIY bar cart from bookcase | Vintage Floral Cottage

DIY bar cart from bookcase | Vintage Floral Cottage

DIY bar cart from bookcase | Vintage Floral Cottage

We also opted for caster wheels on the bottom, and envisioned a sort of industrial color scheme with a light green painted base and a faux copper spray-painted top.

DIY bar cart from bookcase | Vintage Floral Cottage

DIY bar cart from bookcase | Vintage Floral Cottage

We put the finished cabinet in one of our antique booths, and to our delight it sold within a week. After this project, we’re pretty well convinced that most any cabinet could be repurposed into a home bar!

Update: I’m sharing this project at Donna’s DIY Salvaged Junk Projects link party! Click through for great inspiration!

Posted in DIY & Crafts | Leave a comment

Quick, cute ghost craft just in time for Halloween!

Okay right off the bat let me apologize for the terrible pictures accompanying this post! I did not stop along the way during this project to take good photos, but when it came out SO CUTE… well I had to quickly take a few pictures to share so you would have plenty of time before Halloween to make your own…

Glow-in-the-dark Ghosties! 

I wanted something fun and not-too-scary to use as decorations in my yard for trick-or-treaters, and these seemed like they would be  very easy and inexpensive to make. And they were!

Ghostie Craft | Vintage Floral Cottage

For each glow-in-the-dark ghostie, you will need:

  • Six-inch clear plastic Christmas ornament (Michaels)
  • Scrap of dark-colored felt
  • Six-inch yellow glow-stick
  • Chunk of very thin white fabric or spooky Halloween gauze (I used a piece about 24 x 24 inches)
  • Twine, jute, or anything handy to make a loop for hanging
  • White glue

Here’s the simple round-up of materials for the project!

Ghosties Craft | Vintage Floral Cottage

Here are the very simple instructions!

  1. Cut out eyes and a mouth from the felt, any shape you desire that looks “ghostly.” Glue the felt pieces onto the clear plastic ornament, and allow to dry completely.Ghosties Craft | Vintage Floral Cottage
  2. Cut a small slit in the center of your fabric piece, just big enough for the wire loop of the ornament to slip through. You can also tatter the bottom edge of your fabric for additional spookiness.Ghostie Craft | Vintage Floral Cottage
  3. Remember that the glow-sticks only last a few hours, so at the appropriate time, bend/crack your glow-stick thoroughly up and down the length of the stick… shake it gently to distribute the material inside, and then remove the top off the ornament and put the glow-stick inside. I had to bend them a little to get them to fit. Replace the top on the ornament. I tested a few colors of glow-stick and found the yellow to be the brightest and most effective.Ghostie Craft | Vintage Floral Cottage
  4. Drape the fabric over it, slipping the top loop through the slit in the fabric.Ghostie Craft | Vintage Floral Cottage
    Ghostie Craft | Vintage Floral Cottage
  5. To fully test the effect, turn off all the lights.Ghostie Craft | Vintage Floral Cottage

You can use twine or jute to make a loop for hanging, depending on how you are going to display them. I’ll be hanging mine from a shepherd’s hook in the yard, so I needed a hanging loop.

I made three and will use them to delight and scare my trick-or-treaters!

Here’s an image for you to Pin if you would like to… although again… those photos – scary-bad! LOL

Ghostie craft pin image | Vintage Floral Cottage

Posted in DIY & Crafts, Holidays | Leave a comment

Attempted Murder: Spooky Crow Craft for Halloween

I have a hard time finding Halloween decor that I like. I’m not much for the cartoony kid stuff, and I also dislike – rather intensely, I might add – the gory options like zombies, axe murderers, chain-saw-wielding villains, etc.

But one thing I do like – is crows!

Beautiful, sociable and really smart – crows are so “present” in Fall that they just seem a natural motif, along with their avian cousin, the raven, for late-Autumn decor. And I found it’s easy to make them just a little bit spooky for Halloween in a very non-cartoony and non-zombie way!

Last year, my search for Halloween decor led me to two places: Dollar Tree, and Goodwill. (Big surprise, I know!) I loved the glittery faux crows I found at Dollar Tree, and my trip to Goodwill yielded a perfect candlestick-style lamp base. I was initially thinking I would just style these items together on a shelf or something, but then I thought – why not combine them!

So with all of this plus a black feather boa, I crafted this perching crow:

Perching Crow for Halloween | Vintage Floral Cottage

Well, I loved him SO much! So this year I vowed to make a few more, especially after scoring these two perfectly spooky lamp bases – two for a dollar! – at a flea market! They are metal, and the green faceted centers are plastic.

Perching Crow for Halloween | Vintage Floral Cottage

To make a perching crow of your own, you will need:

  • Thrifted candlestick lamp base (OR – glass taper candleholder or glass bud vase from Dollar Tree)
  • Faux crow (Seasonal at Dollar Tree)
  • Black feather boa (Seasonal at Dollar Tree)
  • Chunk of florist foam (Dollar Tree)
  • Hot glue
  • Black spray paint in satin finish

Assembly is about as easy as it gets:

  1. Spray paint your base

    Perching Crow for Halloween | Vintage Floral Cottage
  2. Glue a small chunk of the florist foam down into the candle well or “wiring well” of your base.
  3. Poke the wires coming out of the bird’s feet down into the foam, and cover the entire area with hot glue, including the feet. (This won’t be seen once the feathers are in place.)Perching Crow for Halloween | Vintage Floral Cottage
  4. Glue a length of feathers around the top of the base and the bird’s feet. NOTE: Be prepared for the feathers to make a mess! And DON’T stress about the feathers being perfect! Once they are on, they will look awesome even if they pull apart a little and stick to your glue-covered fingers like mine did.
Perching Crow for Halloween | Vintage Floral Cottage

Here are the two made from the green globe lamp bases:

Perching Crow for Halloween | Vintage Floral Cottage

I also made one from a glass taper candleholder:

Perching Crow for Halloween | Vintage Floral Cottage

I love how the variations in the faces give them distinct personalities! Doesn’t he look like he’s very curious about what you’re up to?  

Perching Crow for Halloween | Vintage Floral Cottage

And here they are perched alongside my Gothic-style radio cabinet:

Perching Crow for Halloween | Vintage Floral Cottage


I’m sharing my “attempted murder” (ha – get it? Because a group of crows is called a murder… and I “attempted” to make a group of crows! oh, I crack me up!) … over at the DIY Salvaged Junk party at FunkyJunkInteriors.net! Also sharing at Marty’s lovely blog, A Stroll Thru Life, for Inspire Me Tuesday, and at the 100th Celebrate Your Story link party at Chloe’s Celebrate & Decorate.

Spooky Crow Craft | Vintage Floral Cottage

Here’s an image to Pin if you like!

Simple Easy Halloween Craft making gothic crows

Posted in DIY & Crafts, Holidays | 6 Comments

Shopping for pumpkins in the rain

As you know I marginally resisted the arrival of Fall this year, but once I got back from my Disney vacation on October 1 I was ready for it. So about a week ago I made an executive decision Friday night that I would visit Pumpkin World on Saturday. This is an outdoor shop that opens up every year in the parking lot of a closed-up gas station not too far from my house.  (Kind of like the guy who used to set up there selling velvet Elvis pictures… but better! Better than velvet Elvis? I understand your doubt but… trust me, it’s better than velvet Elvis!)

It’s an area produce vendor, selling hundreds of pumpkins, gourds, corn stalks, straw bales, etc. It’s a Fall Decor bonanza, and I was giddy with excitement the first time I visited. 

Except on Saturday, it was pouring rain. POURING! For extended periods of time!

So I made another executive decision: I wanted to go to Pumpkin World and I was not going to let the rain stop me. I grabbed my umbrella and headed out. I was literally the only customer… what other idiot would be shopping outdoors in a thunderstorm? I got soaking wet from walking through all the puddles but I was determined not to let it ruin my fun. Here’s a peek at my wet and wild visit to Pumpkin World!

Pumpkin World Visit 2017 | Vintage Floral Cottage

If you can’t find the perfect jack-o-lantern here, you’re not trying!

Pumpkin World Visit 2017 | Vintage Floral Cottage

I actually need to go back and get a few more of these cute white pie pumpkins… I found a neat little “face” kit at Dollar Tree (just poke in the pieces to make the face… kind of like Mr. Potato Head!) but the white pie-ers I bought aren’t big enough, and the face I found needs a white pumpkin!

Pumpkin World Visit 2017 | Vintage Floral Cottage


Did someone say “straw bales”?

Pumpkin World Visit 2017 | Vintage Floral Cottage

Cart after cart filled with a wide variety of goodies!

Pumpkin World Visit 2017 | Vintage Floral Cottage

It’s a darn good thing I decided to shop in the rain, because the entire day was either raining hard, letting up, or raining hard again. I’m doing a little more this year in terms of porch decor for Halloween, so I hope the little trick-or-treaters come to my door!


Posted in Gardening, Thinky Thoughts | Leave a comment