Luscious Limoges

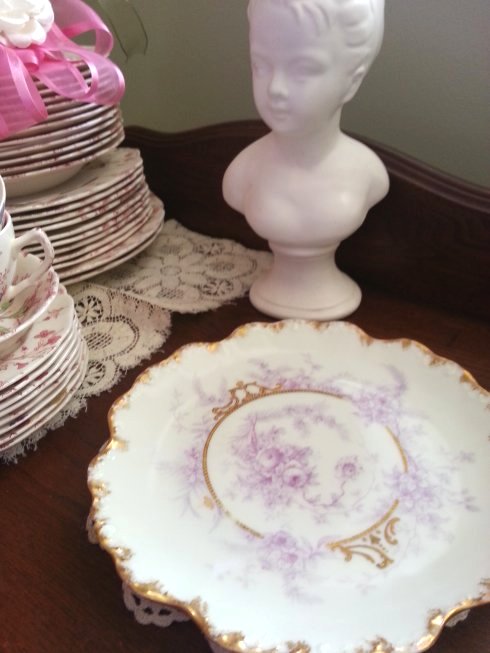
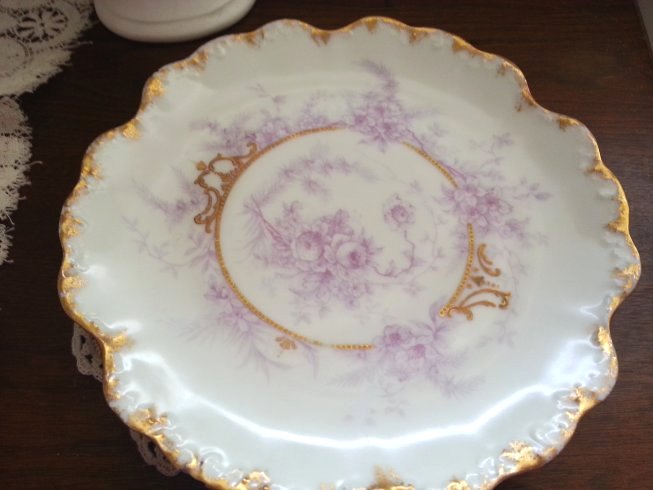
I’ve made several good buys on Ebay recently, but this week my favorite is this lovely porcelain plate. It is real Limoges, about 8-1/4 inches across, and based on the marks was apparently made sometime around 1900-1920.

Handpainted Limoges plate | Vintage Floral Cottage

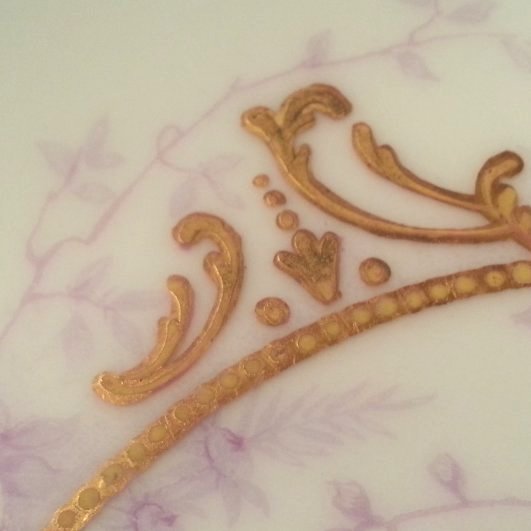
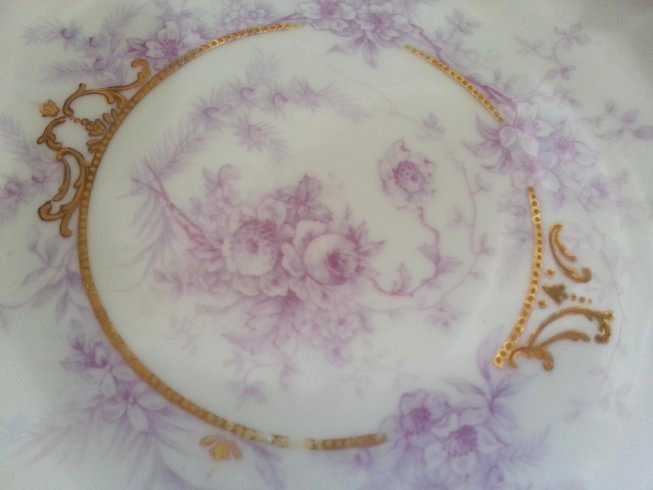
The design is one of hand-painted lavender florals with beautiful gold accents.

Handpainted Limoges plate | Vintage Floral Cottage

Handpainted Limoges plate | Vintage Floral Cottage

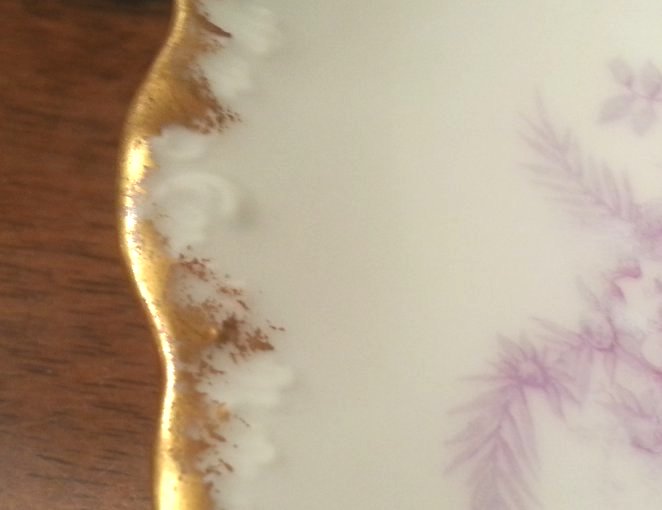
It is interesting to note that the plate has a very detailed embossed border around its scalloped edges, but the gold has been daubed around and over that edge instead of it being precisely painted.

Handpainted Limoges plate | Vintage Floral Cottage

My pretty plate is not in the best condition (a couple of chips and cracks, which I expected) but boy was it a bargain – just $5.50, which included the shipping! Just the type of thing that if I found it in a booth at the antique mall and it was marked $5.50, I’d snap it up just because it’s soooo pretty – and Limoges!

I’ve been reading up a bit on Limoges and learned that the name Limoges refers to the region in France where dozens of manufacturers produced beautiful fine white porcelain beginning in the late 1700’s, when the substance of kaolin was first discovered in the soil of the region.  Prior to 1842, companies produced mainly white blanks – which were then shipped around the world for hobbyists and professionals alike to decorate them with elaborate hand-painted designs. Then in 1842, an American named David Haviland opened a factory in the Limoges region to produce dinnerware for the U.S. market – which caused quite a stir among the French decorative painters who were hired to paint the pieces, because they did NOT want to paint the designs that Haviland knew Americans would love. Haviland further fine-tuned and pioneered in-house firing and decorating techniques that ensured beauty and uniformity in his pieces, and soon Haviland China became the must-have dinnerware for American brides.

Of course, there were many companies producing Limoges pieces besides Haviland. My piece is from the factory of Elite, which was established around 1890 by the American importer Bawo & Dotter of New York. Fine Limoges porcelain continued to be made and exported until around 1930, when international economies and tastes began to shift.

Handpainted Limoges plate | Vintage Floral Cottage


Posted in Secondhand Lifestyle | 3 Comments

Baked French Toast

Do you know what the only thing is that I dislike about French Toast? It’s the fact that I, as the cook, am still dipping bread slices and cooking them up while the rest of the family is enjoying their meal. Seems like a small thing, I know – but it has driven me nuts for years. YEARS, people!!

Same with pancakes – “What do you mean, you guys are done already? I’m just sitting down with my plate!”

And that’s where baked French toast comes in! This stuff is seriously wonderful and I found it… where else – on Pinterest! The original pin came from Rach’s Blog. She shared the recipe, plus suggestions for alterations, and her readers have commented in droves over the past few years with their tips, successes and challenges. For my first attempt, I followed Rach’s original directions except that I left the crusts on and I did cover the dish with foil for the first 25 minutes or so of baking.

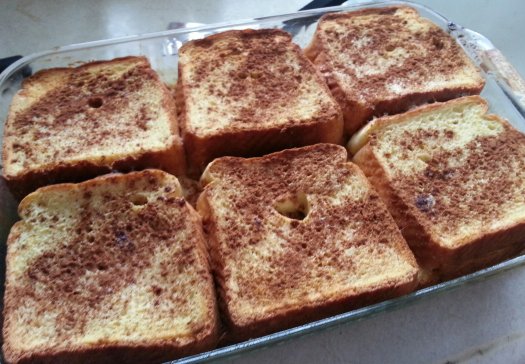
I decided to make this for New Year’s Day brunch for our small family, so, because it had to refrigerate overnight before baking, I assembled it on New Year’s Eve. It turned out great! I didn’t take step-by-step photos, but this picture is how it looked after baking. (You can’t see all the goodness in the middle and bottom of the pan – it’s perfectly coated with egg mixture and there’s a layer of butter and brown sugar on the bottom.)

Baked French Toast | Vintage Floral Cottage
And here’s the recipe, using the steps I used.

Baked French Toast

Ingredients
1/2 cup melted butter
1 cup brown sugar
1 loaf Texas toast (uses 12 slices)
4 eggs
1 – 1/2 cups milk
1 teaspoon vanilla
Powdered sugar for sprinkling, if desired

Evening before serving:

1. Melt butter in microwave.
2. Mix brown sugar into melted butter.
3. Pour butter/sugar mix into bottom of pan and spread around to evenly coat the bottom of the pan.
4. Beat eggs, milk, & vanilla
5. Arrange a single layer of Texas Toast in the pan
6. Spoon and spread half of the egg mixture on the first bread layer
7. Add 2nd layer of Texas Toast
8. Spoon on and spread remaining egg mixture
9. Cover & chill in fridge overnight

On serving day:

1. Sprinkle cinnamon on top layer of bread.
2. Bake, covered, at 350 for 25 minutes. Remove cover and bake 20 minutes more.
3. Sprinkle with powdered sugar if desired.
4. Serve warm with butter and maple syrup

Over on Rach’s blog, some readers’ dishes came out too soggy in the middle. I don’t know why, or how you would fix it if it happens… I just know that in the dish I prepared, the texture ranged from crunchy/toasty on top to soft and moist in the middle, to a bit gooey near the bottom – something for everyone!

Hope you get a chance to make this. If you do, report back here on the results!

Posted in Recipes | 4 Comments

My first-ever (annual?) cookie swap!

I mentioned in my holiday wrap-up that I hosted my first-ever cookie exchange party on December 8. Have you ever attended – or hosted – one of these? I hadn’t attended one for many years – and had never hosted one before. I will just say, it was about as stress-free (for me) as I could possibly make it, and that was my goal – I didn’t want to create a monster! Everyone had a great time, including myself.

Generally, a cookie swap party is where guests bring a TON of their favorite homemade cookie to share, and everyone goes around the table collecting up massive amounts of all the cookies to take home and/or give as gifts. This requires guests to bring anywhere from six to nine dozen cookies apiece – at least, that’s what I’ve read. I wasn’t really comfortable asking guests to make nine dozen cookies – it just seemed like a huge time commitment, in addition to attending the party, at a very busy time of year. So, my party was more of a cookie sampling recipe exchange than an actual cookie swap. Although as it turned out, there were plenty of cookies for each guest to take home a plate full!

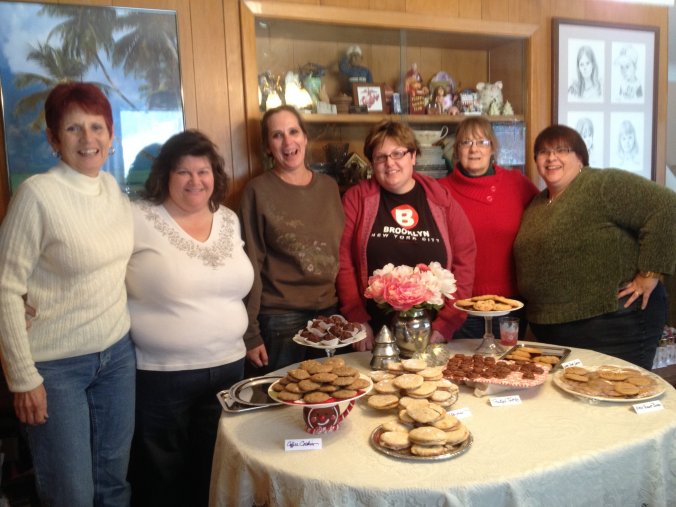
Here’s me (second from left) and my guests – Shirley, Val, Molly, Penney & Vicki:

First Cookie Swap 2013 | Vintage Floral Cottage


I chose a Sunday early in December for my party – I wanted everyone to have time to make the cookies they’d sampled, in their own holiday baking. Each guest was asked to bring 3 dozen cookies, homemade and “holiday special,” along with 12 copies of their recipe to share. I also asked each guest to be sure to RSVP by a certain date so I could plan for the right numbers.

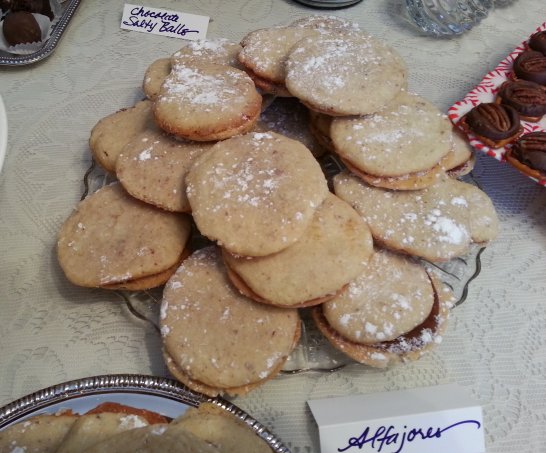
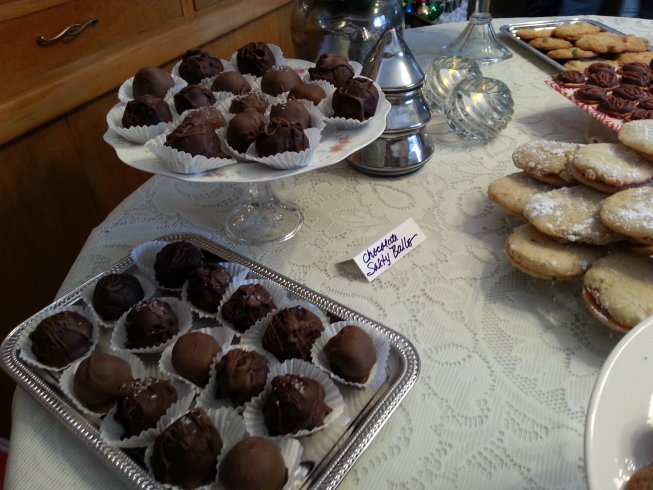
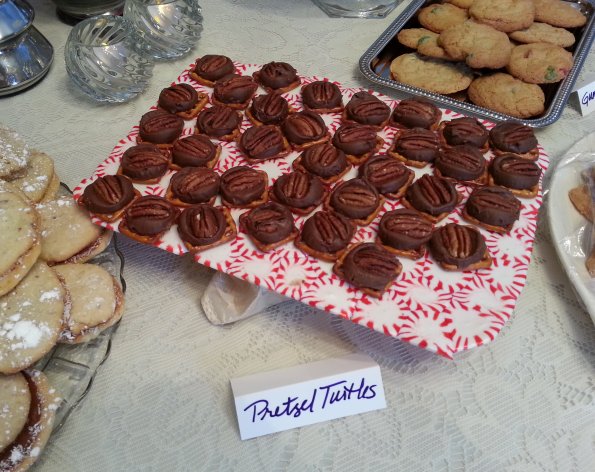
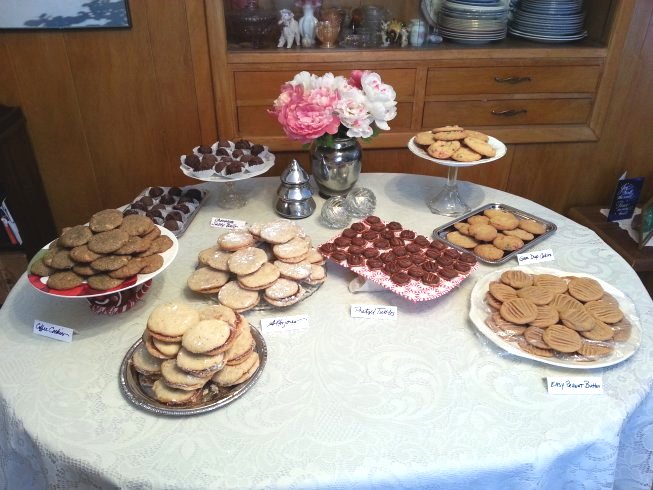
As they arrived we set their cookies on pretty plates and platters on the cookie table. As a kick-off to the party, we played a memory game where each guest introduced herself and talked about the cookies she brought – then guests had to match up each person with their cookies on a scorecard. Following this game, we sampled all the cookies and chatted about the merits and challenges of each one – we had Oreo Balls (aka “Chocolate Salty Balls,” Coffee Cookies, Alfajores, Easy Peanut Butter cookies, Gum Drop cookies, and Pretzel Turtles.

First Cookie Swap 2013 | Vintage Floral Cottage

First Cookie Swap 2013 | Vintage Floral Cottage

First Cookie Swap 2013 | Vintage Floral Cottage

We also played my own original game, “Christmas Movie Mix-Up.” For this game I wrote one-sentence summaries of the plots of 8 Christmas Movies, and they had to guess the movie name based on the plot summary.

The final game was “Who’s Going to Make It Up the Street in the Snow,” because, being Iowa in December, it had started snowing early in the morning! Fortunately this didn’t keep anyone from attending, but by the time the party ended we had a couple inches of it to contend with. Fortunately everyone won this game and made it home safely.

First Cookie Swap 2013 | Vintage Floral Cottage


In all the day ended up full of fun, friends, and winter beauty. I’m SO glad I did it, and will definitely be hosting another cookie party in 2014!

Posted in Holidays | Tagged , | 5 Comments

Patio Garden memories

Editor’s note: WOOHOO!! I FOUND all the pictures of my old patio that I thought I had lost! I had this post all ready to go with a few stragglers that I had managed to dig up, but then I found where I had actually saved ALL the pictures on my computer. I did not (and DO not) remember doing that, but I am so glad I did! I’m sharing my favorites here!

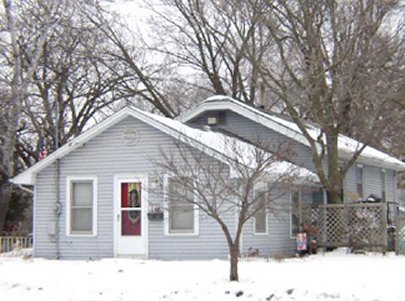
Our old house didn’t have much to recommend it –  it was small, next to a dusty gravel road where young drivers liked to spin their tires, and over time the neighborhood around it had evolved into a bit of an industrial area so it was located right across the street from a factory. But it was the house my husband grew up in. Our daughter was born there, and we lived there as a family for 17 years, from 1991 – 2008 when it was finally destroyed by flooding. Here it is in winter:
Patio Garden Memories | Vintage Floral Cottage


My favorite part of the house and property was the patio on the east side of the house. (In the photo above, we’re looking north. The patio is behind the fence on the right side of the picture. And yes, that big tree is wayyy too close to the house – and yes it was becoming a problem.) The patio was a slab of blacktop surrounded on three sides by a three-foot deep perennial border, and a lattice fence. On one end of the patio was a healthy row of large, old peony bushes – one of my favorite flowers.

Every year in the Spring and early summer, I would spend just about all my spare time tending the perennial border – moving plants around, adding new ones, arranging the “garden junk,” and just generally puttering. I absolutely was in heaven in this space, and I’ll be honest: while I don’t miss a lot of things about the house, I do miss the patio.

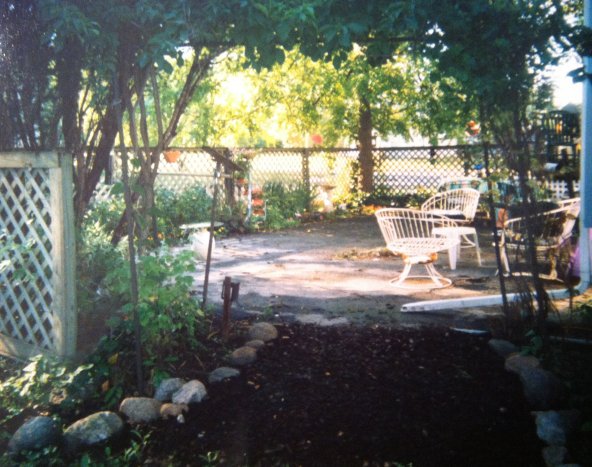
Here is the entry to the patio from the back yard. I built the path myself as a little walkway under the arbor, which was built out of plumbing pipe by my father-in-law sometime in the 1950’s when he owned the house.
Patio Garden Memories | Vintage Floral Cottage


Here’s a better view of the little iron patio set – this was a garage sale find. FIVE dollars for all three pieces! I took a lot of naps on that glider! And, I made the table in the middle out of a thrifted lamp base. You can guess that because of the base’s shape, this wasn’t the sturdiest of tables. It sure was pretty though!
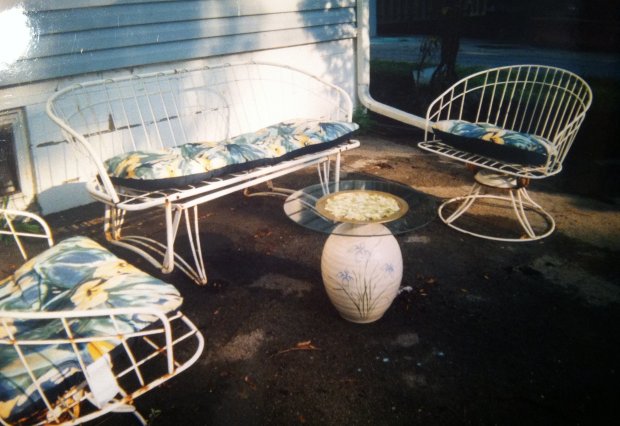
Patio Garden Memories | Vintage Floral Cottage

Here is the area immediately to the left as you step in under the arbor. I love putting found items into the garden landscape – I honestly think that almost anything looks better with greenery growing around it! Here you can spot a little pedal car – a curb find – and, leaning against the fence, an old piece of barnwood that actually has a landscape painted on it.  The little trellis in the foreground was lashed together by my daughter. Plants in this area include hosta, peony, and bee balm. The tree is a yew that I “shaved” of it lower branches. You can’t see the full, green top, but this thing grew to be a monster by the time we left in 2008.
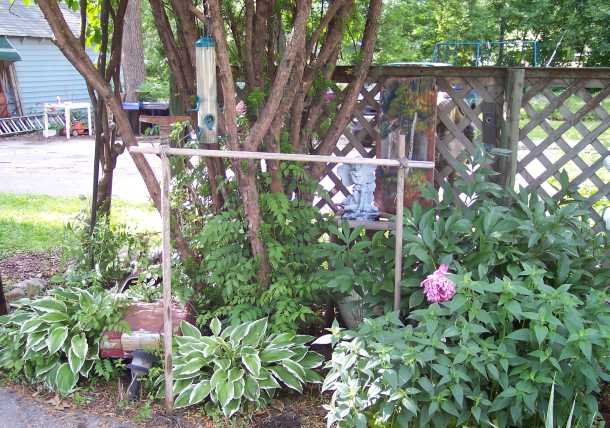
Patio Garden Memories | Vintage Floral Cottage


Proceeding to the right from the previous photo, below is a very over-grown corner that I cleaned out one year, then built the little path, filled in with some new plants and junk, and left the patch of ribbon grass. This space looked a little different each year – in later years it was filled with purple coneflower. My pictures are not all from the same year so you can see how it evolved. This picture is before I planted the bee balm.
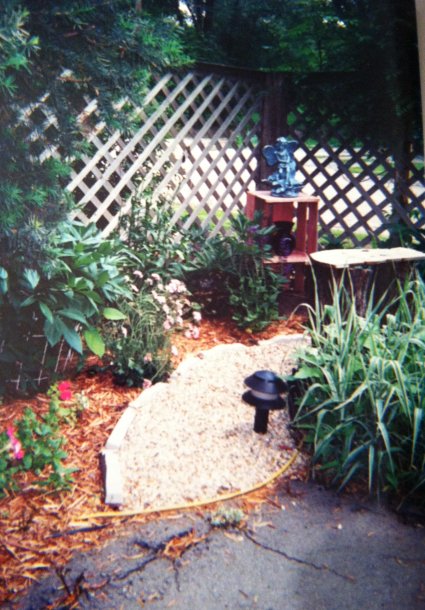
Patio Garden Memories | Vintage Floral Cottage

Here’s the same space in a different year, when I took everything out and replaced it with mulch and stepping stones. The stones were acquired through a very unusual trade – I gave a local gal some bowling balls that she was going to decorate for the garden, and she gave me these pavers! You can see purple coneflower getting started in the lower right.
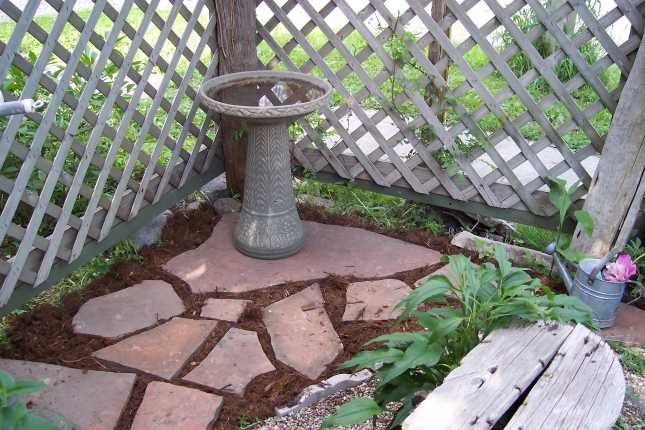
Patio Garden Memories | Vintage Floral Cottage


This photo shows how I was able to use the remnants of a redbud tree by making it into a little shelf using the bottom of an old barrel planter.
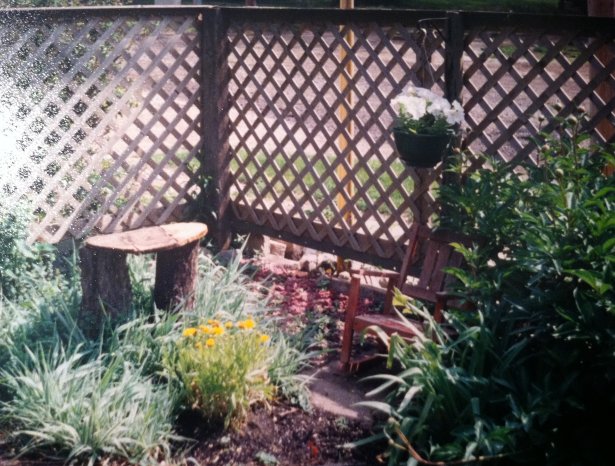
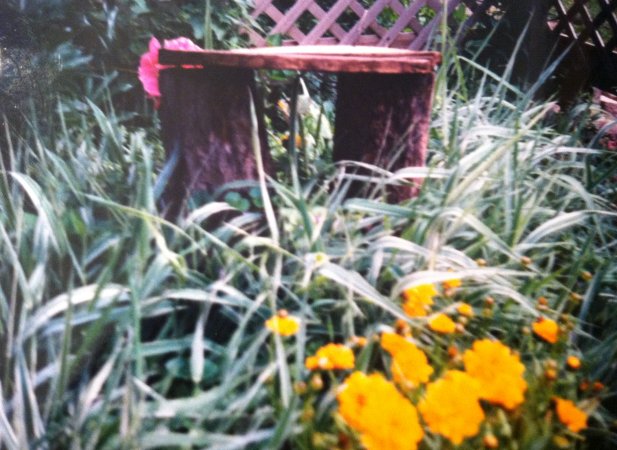
Patio Garden Memories | Vintage Floral Cottage

Patio Garden Memories | Vintage Floral Cottage


One of my favorite activities was acquiring different pieces of junk and turning them into garden vignettes. This child’s rocker was a curb find and I always loved the look of it sitting among the peonies.
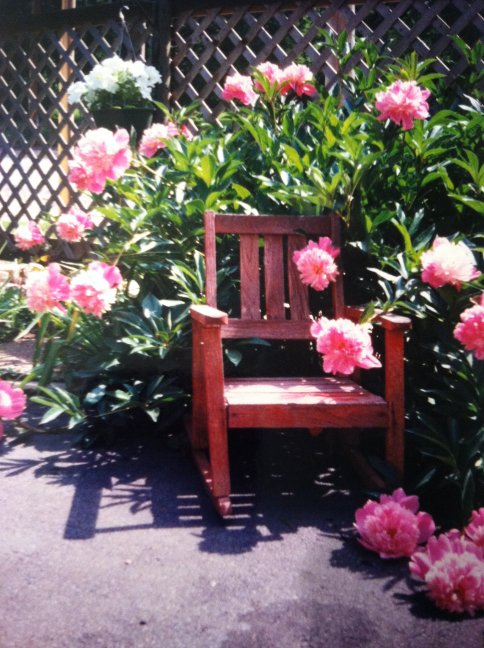
Patio Garden Memories | Vintage Floral Cottage

Here’s another view of the peonies in full bloom. The little patch of yellow to the left is Coreopsis Moonbeam, and the ribbon grass to the left of that. The Coreopsis didn’t last long in this spot, but the ribbon grass was there for many years – my mother-in-law planted it when she lived in the house.
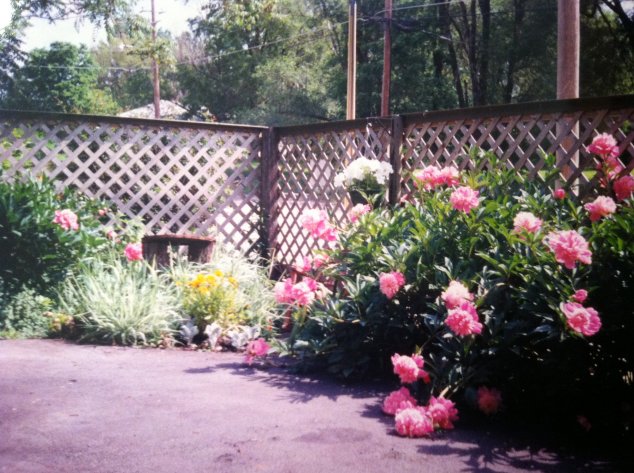
Patio Garden Memories | Vintage Floral Cottage

In the next few photos I stood in one spot along the longest part of the patio and took pictures to my left and right. This shot shows the corner we just saw, at the far left. You can see Mary in the corner, and a painted window frame/bird feeder project that I’ll show you in close-up later. The peonies by this time have thinned out – this happened because some of the trees in the area grew up and over, creating more shade at that end in the later years that we lived here.
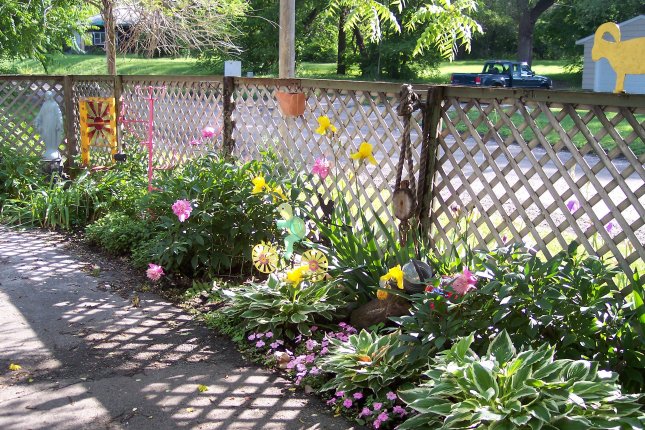
Patio Garden Memories | Vintage Floral Cottage


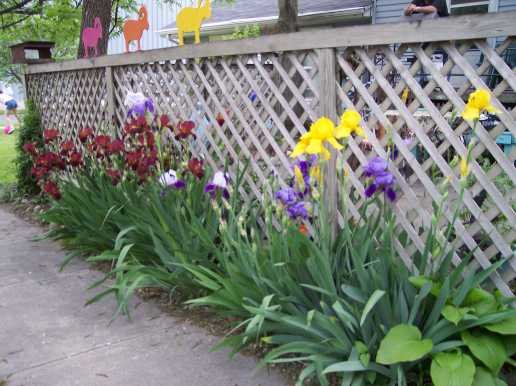
Turning to the right, this end of the patio was mostly in shade. Here I grew impatiens, Columbine, Bleeding Hearts, and other shade-lovers. The three rams marching across the fence are made of steel. I found these buried in an old overgrown garden that was being torn out at my friend’s daughter’s house. They were shooting targets! I painted them in my favorite bright colors and mounted them along the top of the fence, bullet dents and all! Peeking through the lattice, you can see some beautiful irises – those also came from my friend’s dismantled garden.
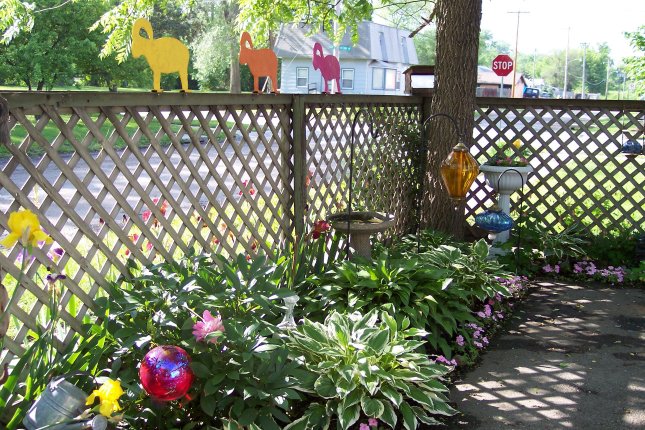
Patio Garden Memories | Vintage Floral Cottage


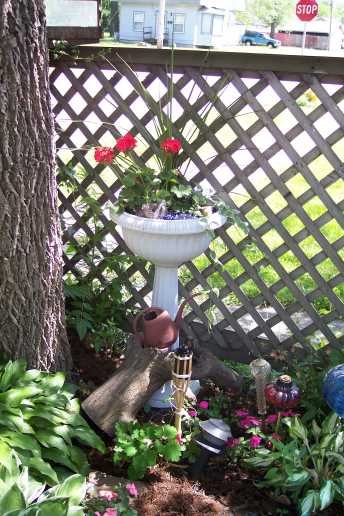
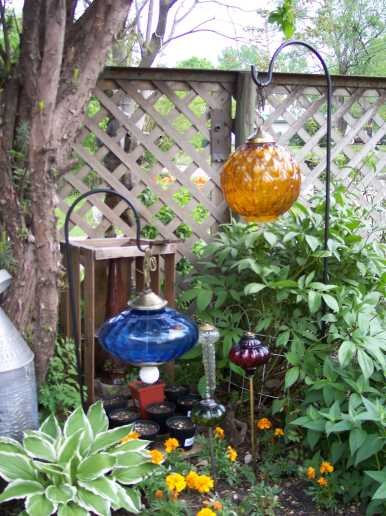
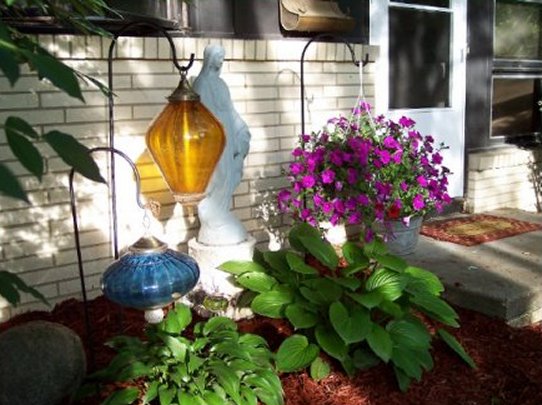
Turning a little more to the right, here’s the south end. My junky artistry here is the glass globes – I disassembled some thrifted lamps, and put the glass bases back together with various bits of lamp hardware so I could hang them from the shepherd’s hooks. The blue one is my favorite – I’ve never seen another lamp quite like that one!
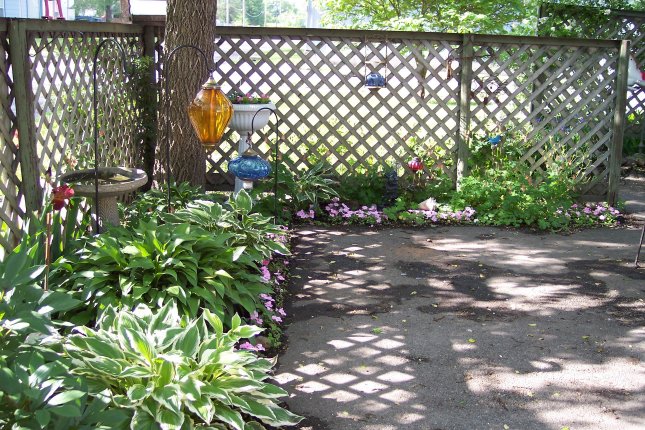
Patio Garden Memories | Vintage Floral Cottage


This shot is the area shown above, in another year. You can tell I moved stuff around a lot! This shot also gives you a better look at the blue lamp.
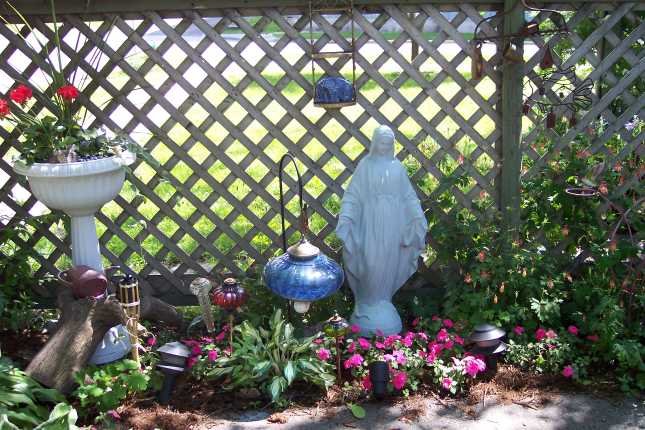
Patio Garden Memories | Vintage Floral Cottage

Patio Garden Memories | Vintage Floral Cottage


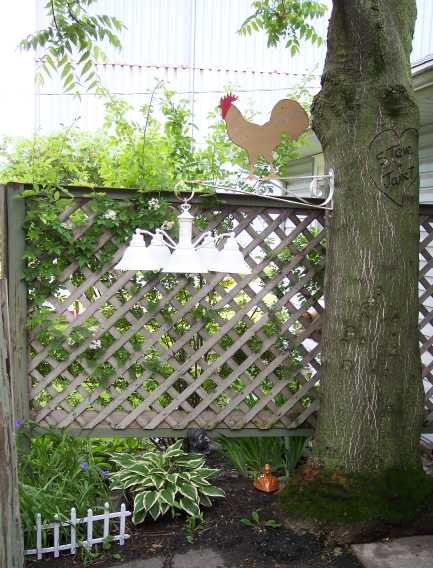
This area is a few more steps to the right, showing the tree that’s too close to the house. (My husband used a router to carve our names into it!) The item attached to the tree is a large iron bracket for a business sign, with a painted rooster on top of it. I hung the white chandelier from the bracket for a bit of humor. One year, I was sitting out on the patio admiring my space and noticed that the sign bracket had been stolen! I was very upset about that… someone had come up into my yard, inches from my house, and wrestled that thing loose from the tree – and carted it away as if they were entitled to it! Boy was I steamed.
 

 Patio Garden Memories | Vintage Floral Cottage

A couple of miscellaneous projects: here’s a close-up shot of the window/bird feeder, after it had weathered a few years. I picked up this old window frame, broke out the bottom pane, and fit a small tin tray in the open space. Filled it with birdseed and had lots of feathered visitors. This project also allowed me to experiment with stained glass paint.

Patio Garden Memories | Vintage Floral Cottage


And a better shot of the glass globes. I put the smaller ones on sticks so I could poke them in here and there for a bit of sparkle and color:
Patio Garden Memories | Vintage Floral Cottage

On the street-side of the fence, here’s a shot of the irises in full bloom that came from my friend’s daughter’s garden:
Patio Garden Memories | Vintage Floral Cottage

Our new house presents a challenge in that it doesn’t have a ready gardening space near the house itself, with the exception of the small patch shown below near the front door. There’s a perennial bed out across the yard, and I’ve tried to do a little with it, but it doesn’t create the sweet little enclosed oasis that I had with the patio. I will continue to work with it and see how I can improve it. Here’s one shot, showing how I was able to rescue and re-use my glass globes!
Patio Garden Memories | Vintage Floral Cottage


Thank you for sticking with me on this photo-heavy post, and taking a tour of my old patio. I can’t tell you how happy I am to have found my pictures, and am delighted to get to share them!
 

Posted in Gardening | 5 Comments

Weekend finds

Well I hope that you and yours had a wonderful Easter weekend – ours was very quiet, with our daughter off at college and the two of us having no big plans. Still, a good time to reflect and consider the “reason for the season,” and a lovely day, finally with some decent Spring weather!
On Saturday I did just the tiniest bit of treasure-hunting (and treasure-giving, as I donated a few items as well!), and came up with these little goodies that I wanted to share with you!

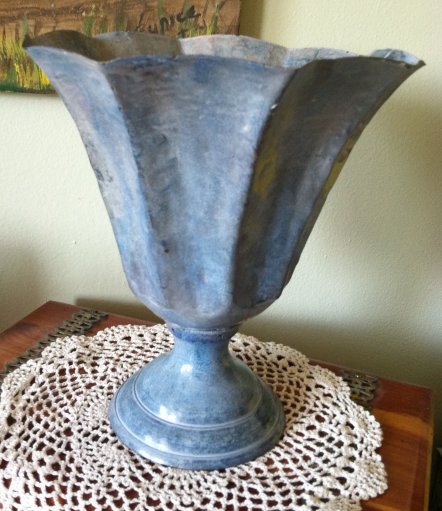
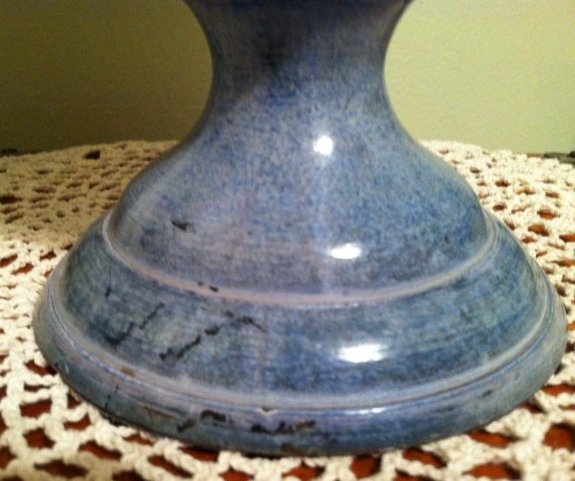
First, photos don’t do justice to this blue vase – the bowl portion is made of tin, but the base is heavier… or maybe it’s weighted for stability. Anyway, it measures about 10 inches high and the blue mottled finish is really stunning in person.

Weekend Thrifty Finds | Vintage Floral Cottage

Weekend Thrifty Finds | Vintage Floral Cottage

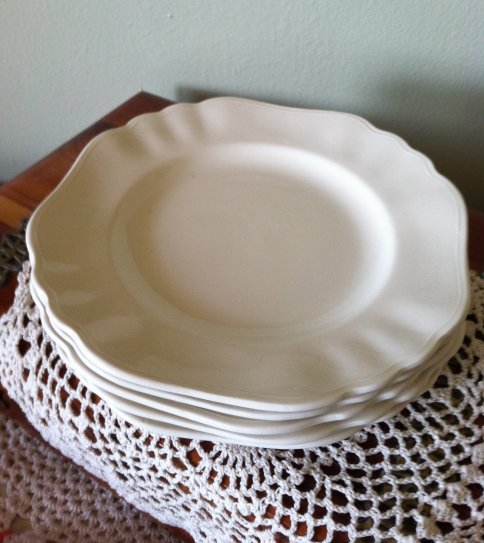
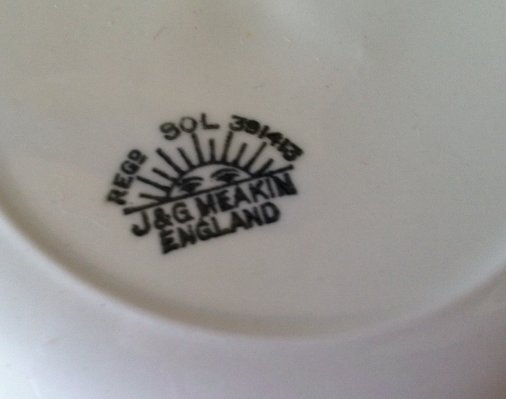
 Next, I picked up five of these pretty little square scalloped bread plates by J&G Meakin – their ivory color goes with nearly everything in my cupboard, and they are made in England. I don’t know too much about the backstamp, but it appeares that the “sun” or “sol” backstamp was first registered in 1912 and “Sol ware” was produced from 1918-1963. So theoretically, these perfect little plates could be anywhere from 50 to 95 years old! At 79 cents each, I really just couldn’t say no.

Weekend Thrifty Finds | Vintage Floral Cottage

Weekend Thrifty Finds | Vintage Floral Cottage

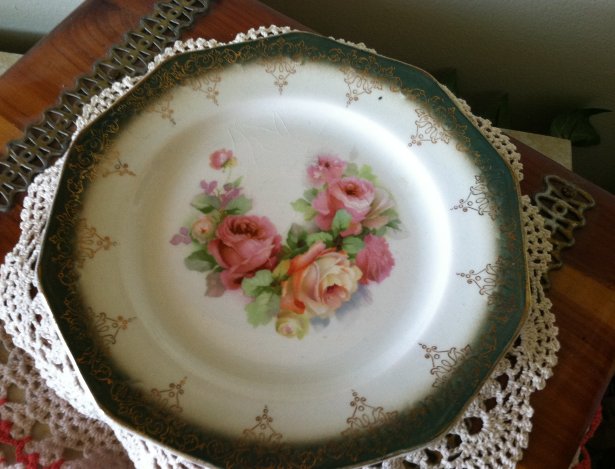
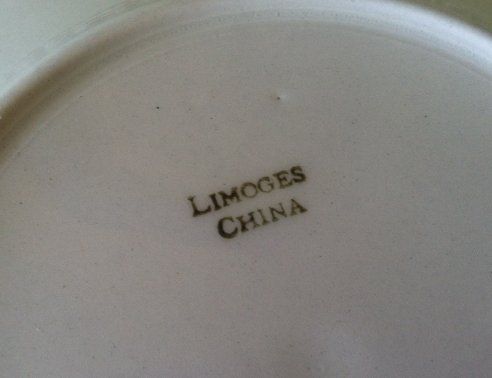
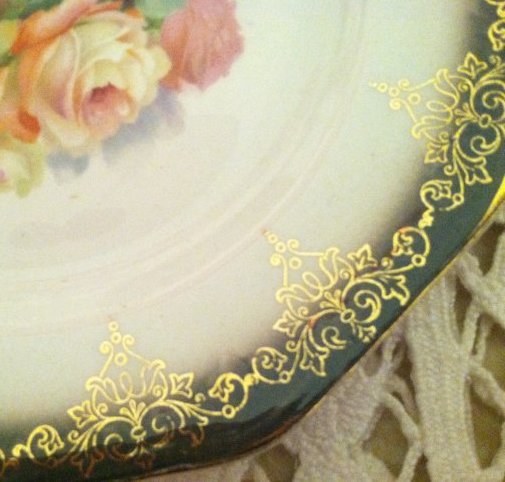
And speaking of backstamps, I felt a little funny about the mark on this pretty plate. It says, “Limoges China.” Limoges, of course, being the location where beautiful French china comes from.

Weekend Thrifty Finds | Vintage Floral Cottage

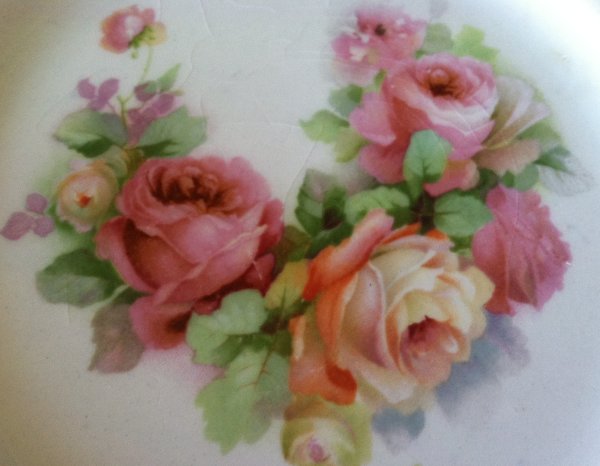
I was suspicious because I thought that real Limoges pieces would normally also say “France” in addition to “Limoges.” I wasn’t sure if “Limoges China” meant something similar to “Royal Albert China”…  or if in fact it meant “fake Limoges china”… or even “something made in China in the style of Limoges.” At any rate, the plate is very pretty even with some crazing of the glaze. The gold edging is really bright and beautiful. And it was all of 99 cents, so I nabbed it solely for its loveliness. And turns out, I was right to be suspicious: at least one Limoges research site shows this mark to be a “fake.” I still love the soft, romantic cottage roses and elegant “gilded” band!

Weekend Thrifty Finds | Vintage Floral Cottage

Weekend Thrifty Finds | Vintage Floral Cottage

Weekend Thrifty Finds | Vintage Floral Cottage

What are YOUR favorite finds from this week?

Posted in Secondhand Lifestyle | 1 Comment