This is my second Christmas tablescape this year. To see the first one, see my earlier post featuring Christmas Ribbon by World Bazaar.
This year, really for the first time ever I think, my Christmas decor seems kind of unified. I tried to stay loosely within a color scheme of pink, gold, and white (a touch of silver here and there could not be helped… “Silver and Gold,” after all…), and as I look around I feel a sense of comfort in the loveliness that surrounds me.
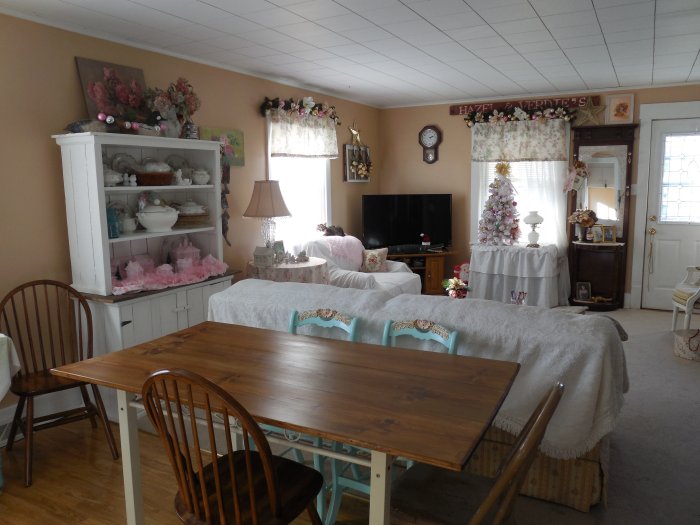
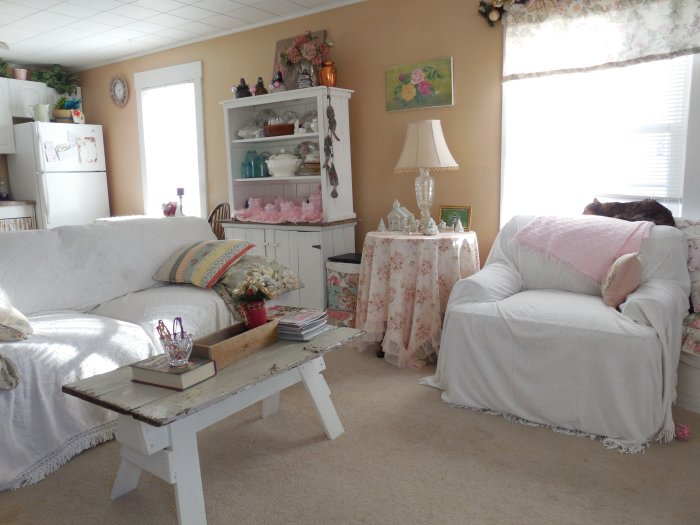
Not that there was ever anything wrong with un-unified… no, I loved the mish-mash of Christmases past when my daughter was little. Tree decorations were handmade, my collection of snowmen was growing, the living room had an almost-Victorian look to the handmade garlands while the bathroom was more of the woodland/”lodge-look.”
But this year it’s definitely more unified, and it feels almost like a hug – maybe that’s just because the furniture looks cozy covered in chenille bedspreads!
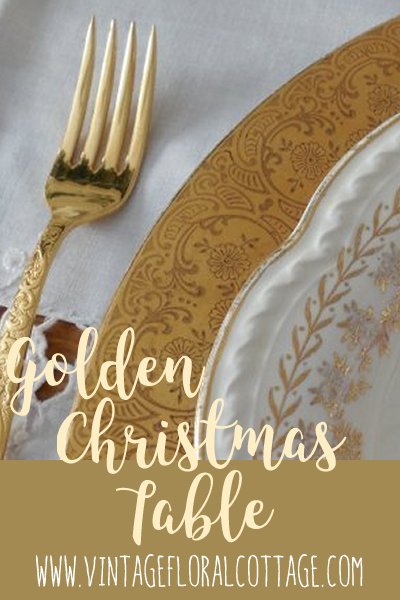
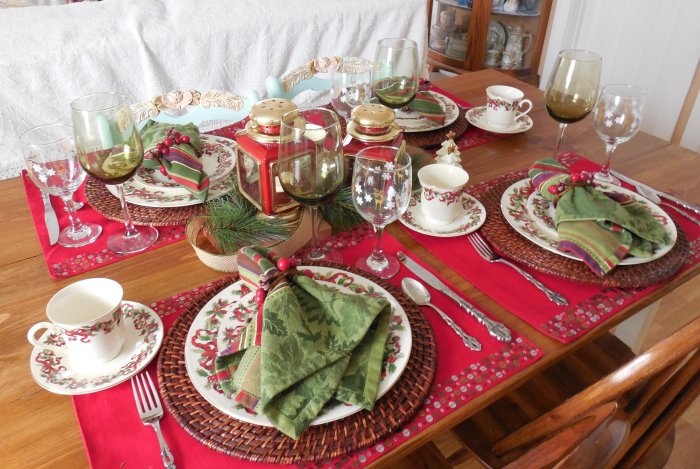
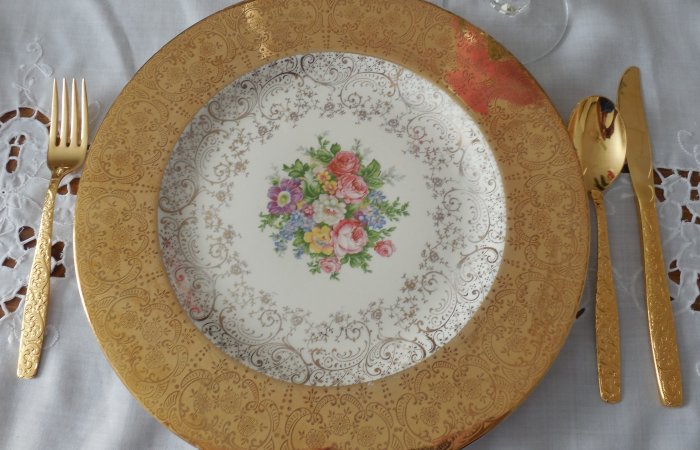
Anyway, I knew that I wanted to carry the pink and gold theme into a Christmas tablescape. But, where my tree and decor are mostly focused on pink, I wanted the table to really shimmer – to be rooted in gold. I had no idea how I was going to achieve that with what I had on hand, until I walked into a thrift store back in early December and found these show-stopping dinner plates.
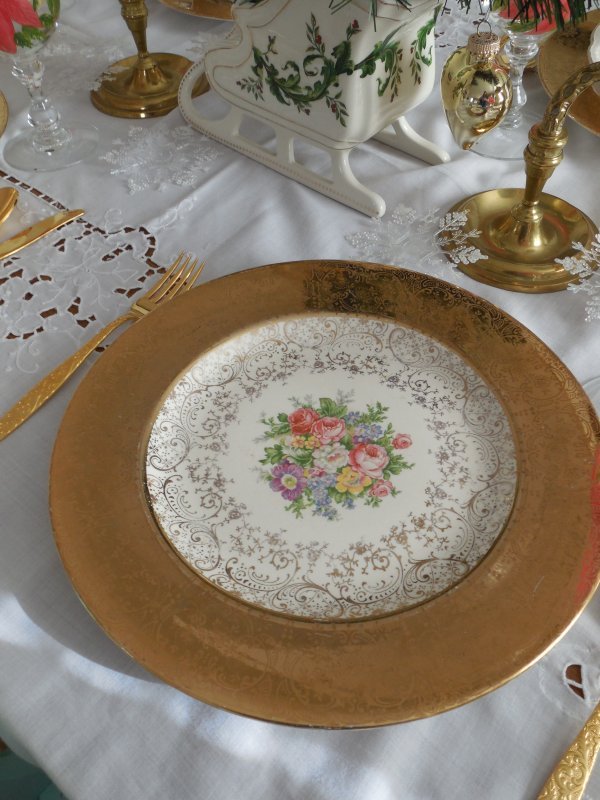
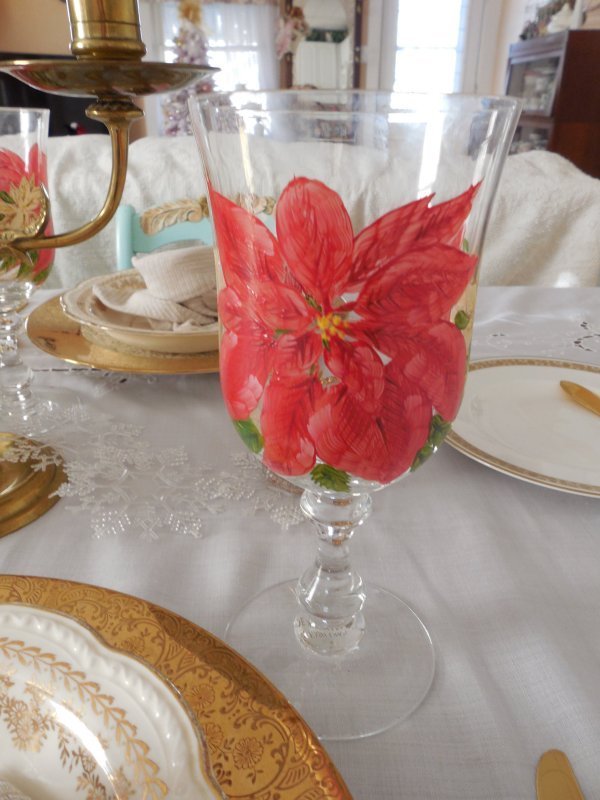
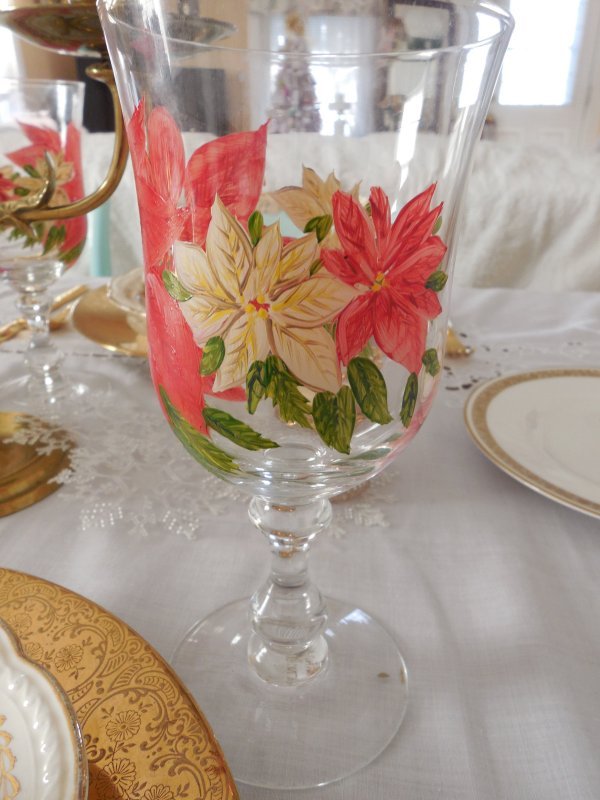
No maker stamped on the back – just an indication that the amazing border and all the gold scrolling around it is 22k gold. Right then and there I knew they would be the basis of my Golden Christmas tablescape. The touch of pink comes from a single element – the glassware, also a thrift-store find, with handpainted poinsettias.
I’ll be honest – I thought the table looked “just okay” when I first stepped back and looked at it. That was on a Friday night – I had set it up with the intention of taking photographs on Saturday morning, in the daylight.
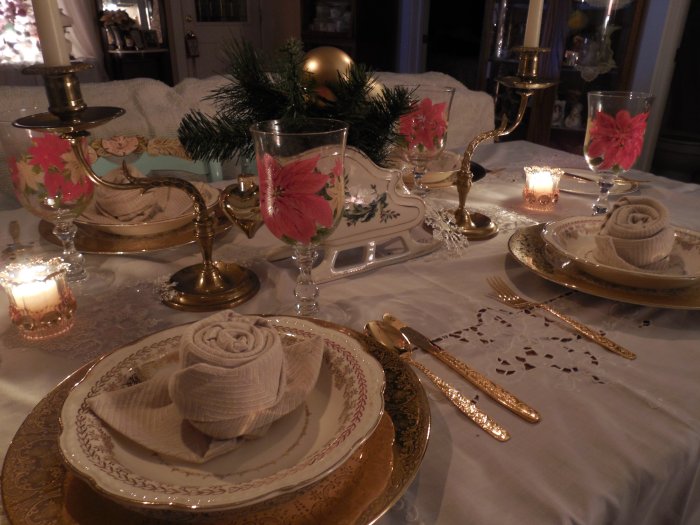
But I couldn’t resist lighting the candles, and when I snapped a few photos in the candlelight, the whole thing took my breath away – the gold was glinty and shimmering, just like I’d imagined. It was beautiful!
The next morning I snapped my first few photos with daylight filling the dollhouse, and it looked so pretty in the pictures that I could hardly believe this beautiful thing – this set table – was in my home. I know it sounds ridiculous to be so overcome by a simple tablescape set for a meal – but it was the very loveliness I had been hoping to create.

So with all that gushing out of the way, let me take you on a tour around the table!
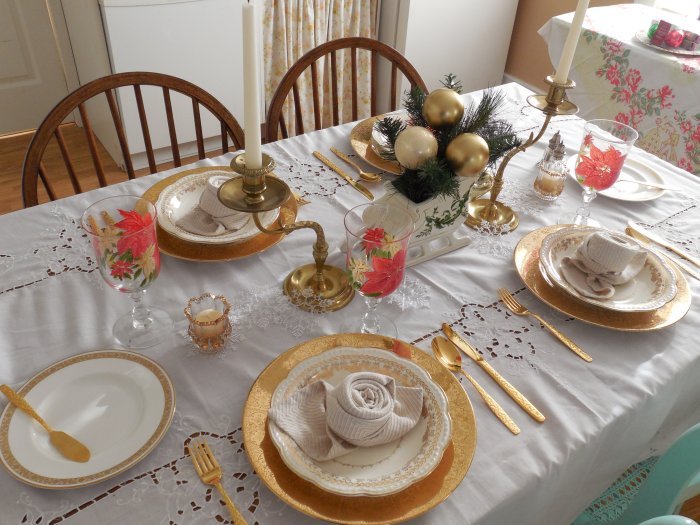
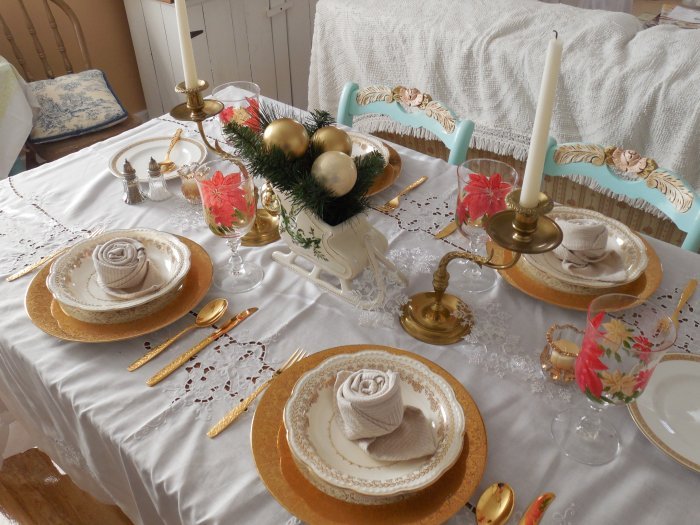
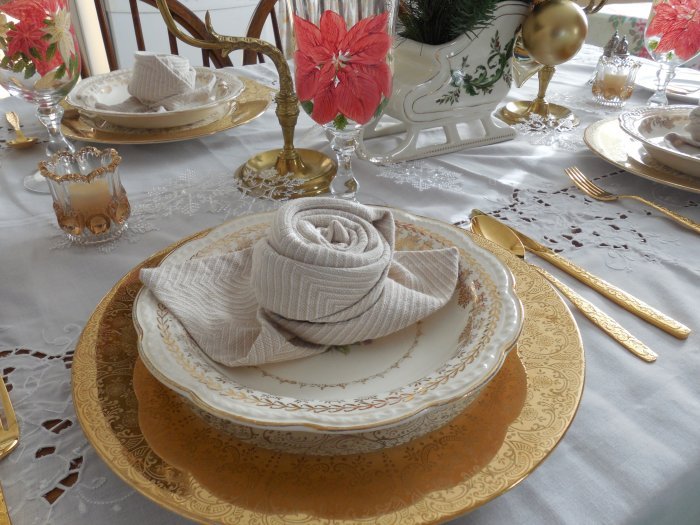
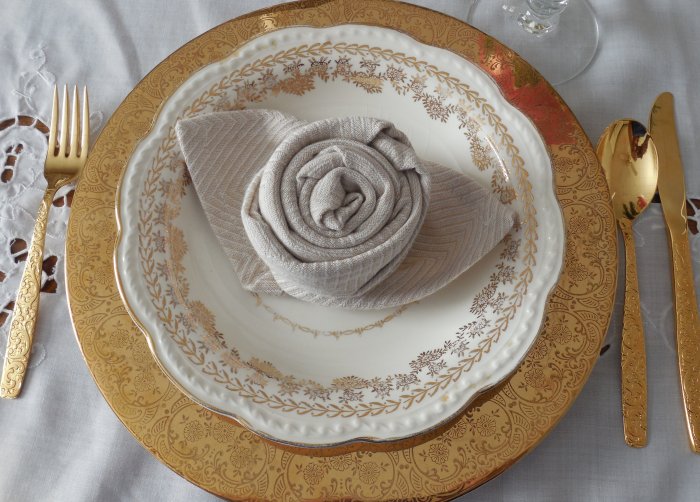
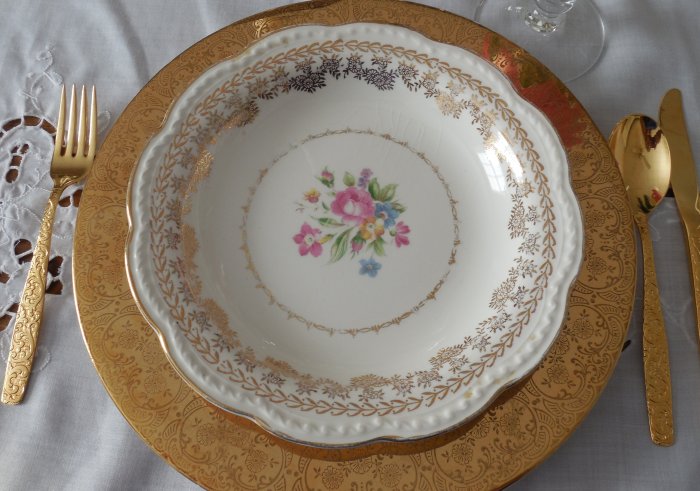
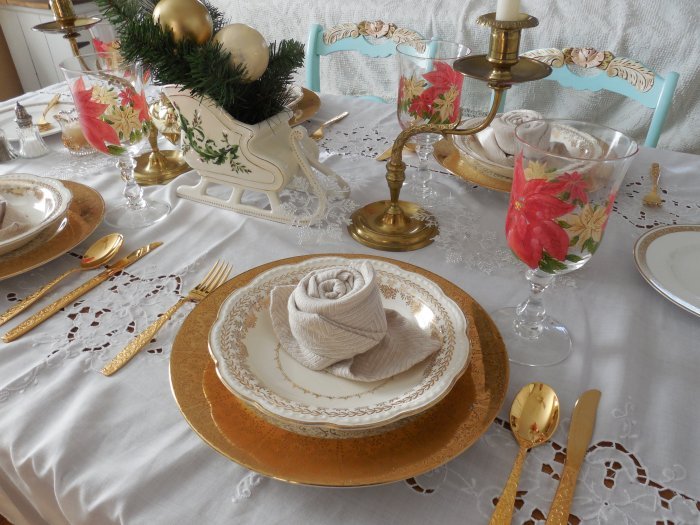
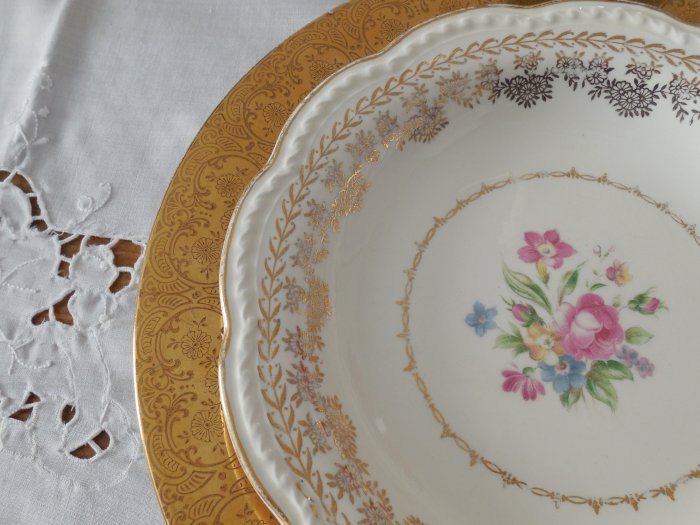
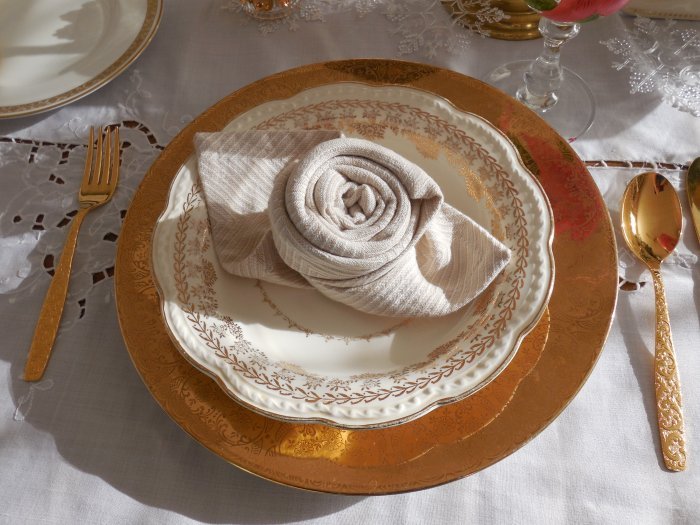
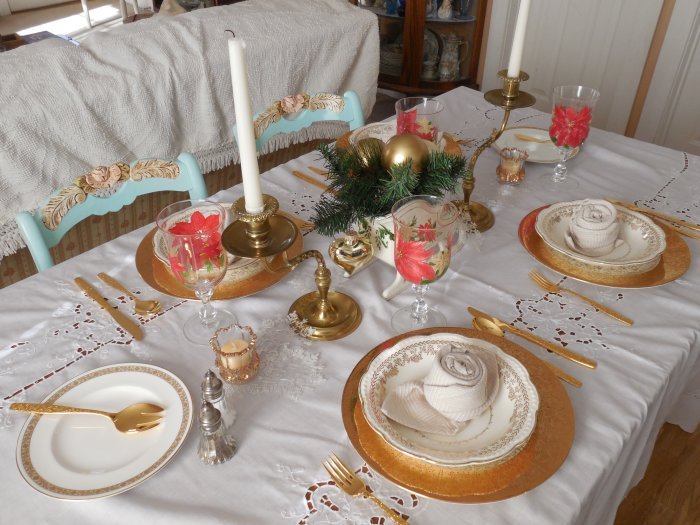
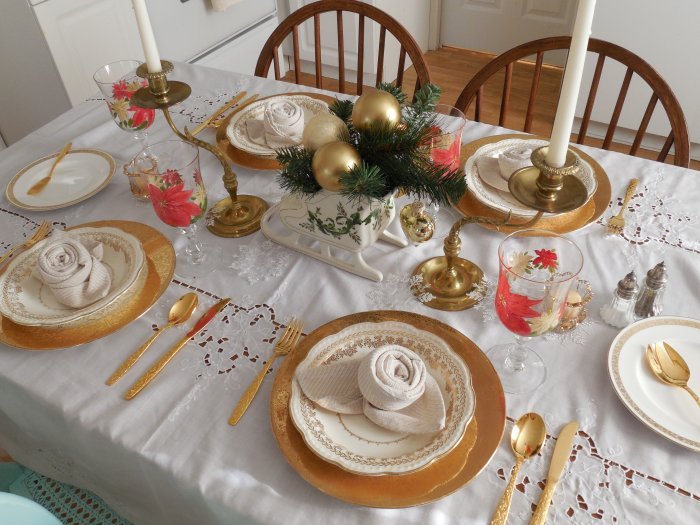
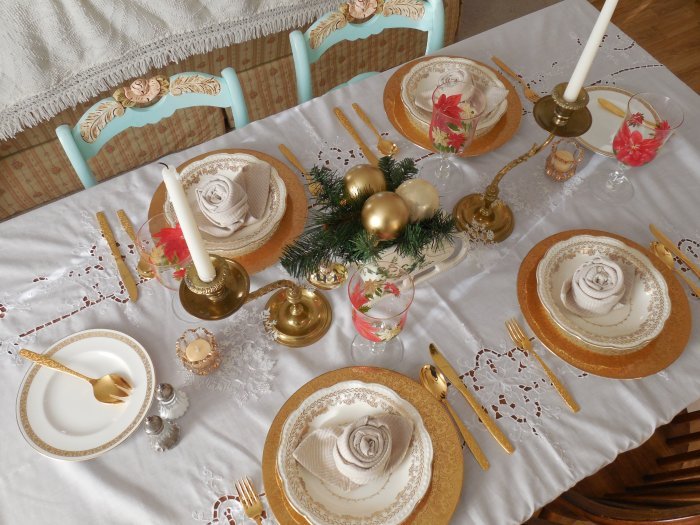
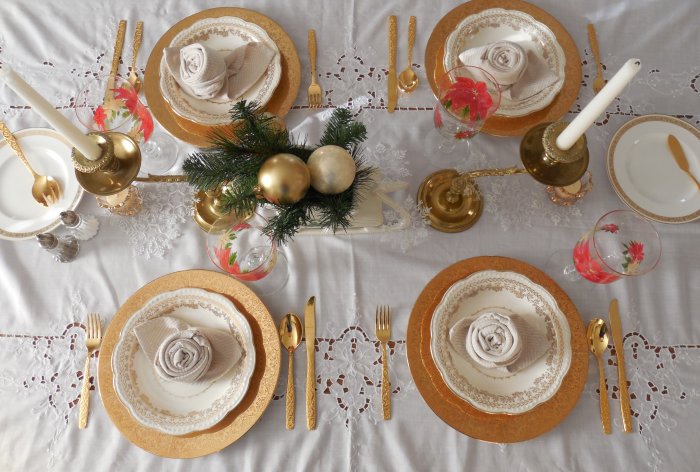
The place setting includes the stunning thrift-store 22k gold-shouldered dinner plates and als0-thrifted gold-trimmed bowls by Stetson in the “American Beauty” pattern. Napkins are in a simple rose fold nestled in each bowl.

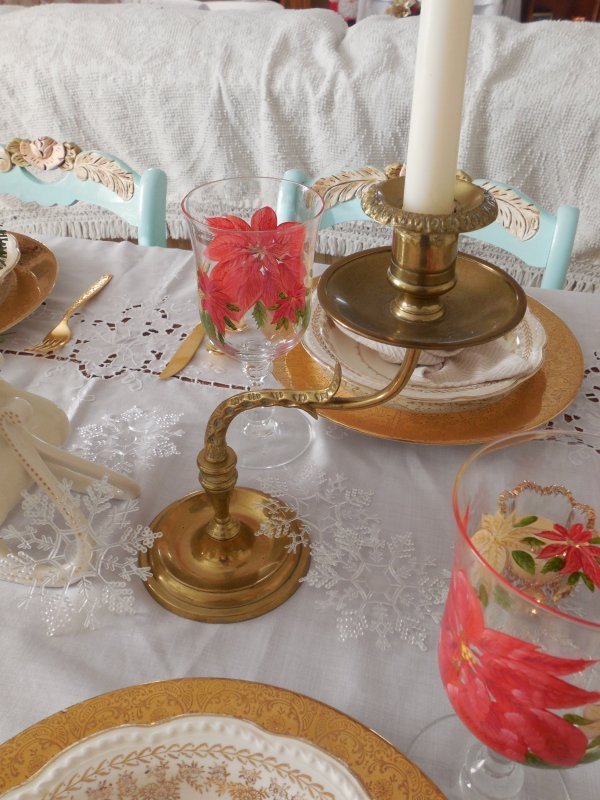
The glassware was also a thrift-store find: four hand-painted water goblets with lovely poinsettias in a deep coral pink and ivory.
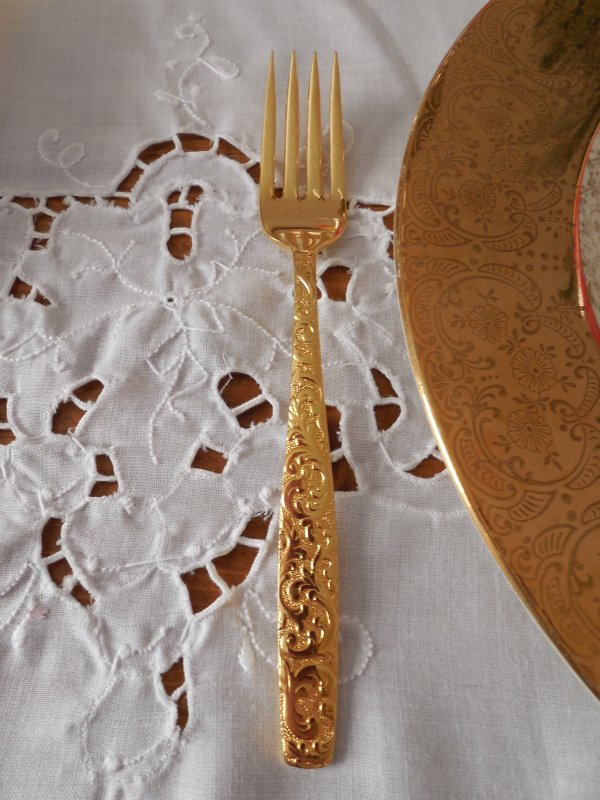
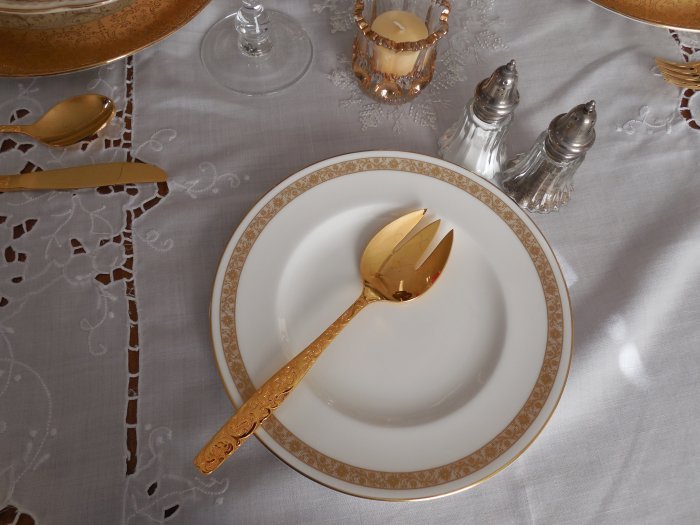
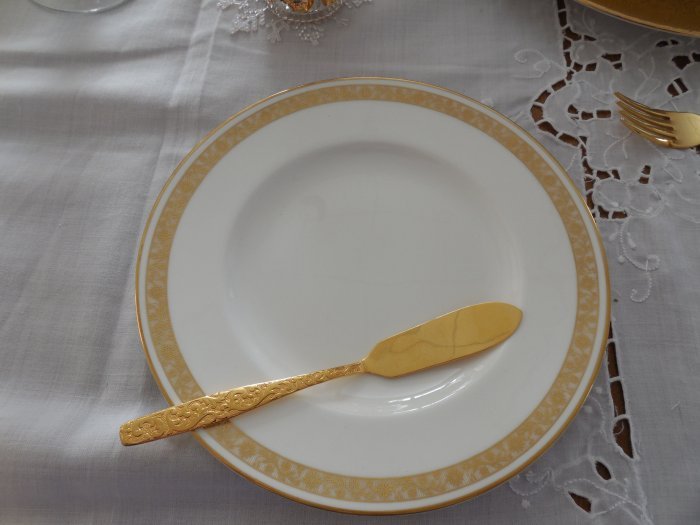
Are you as surprised as I am to see that we have a different set of flatware on the table? For years now the only set I’ve owned has been my hard-working vintage Oneida Chandelier – a gift from my Aunt Hazel. But I’ve had gold-tone flatware on my thrifting list for quite awhile, and late this Fall I scored big with 26 pieces of the electroplated Americana Golden Heritage by International Silver. I was delighted to finally use it in a tablescape!
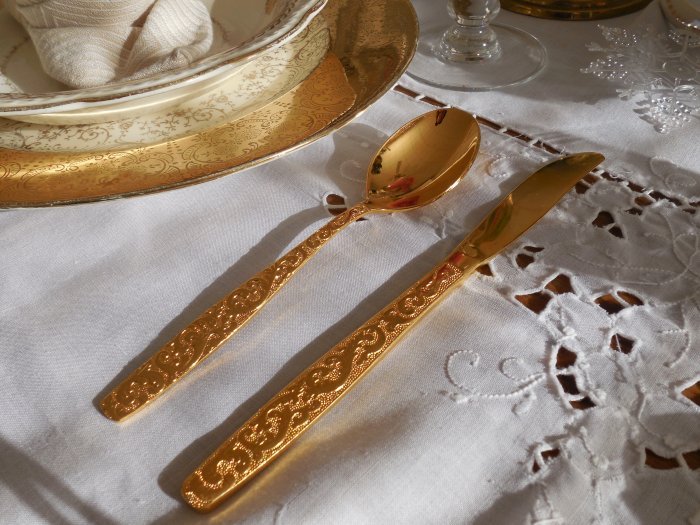
Every piece in lovely condition!
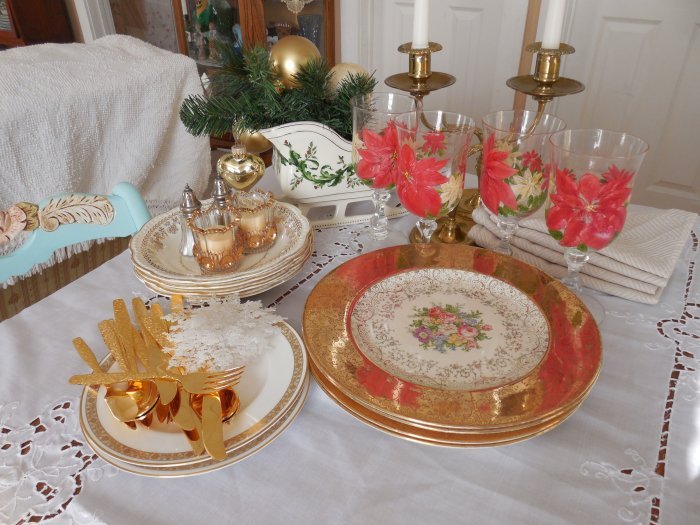
The flatware set also included a few serving pieces, so I have set them at the ends of the table along with Royal Worcester 8-inch plates in the “Golden Anniversary” pattern. These are actually part of two trio sets (cup, saucer and snack plate) that were also found at Goodwill.

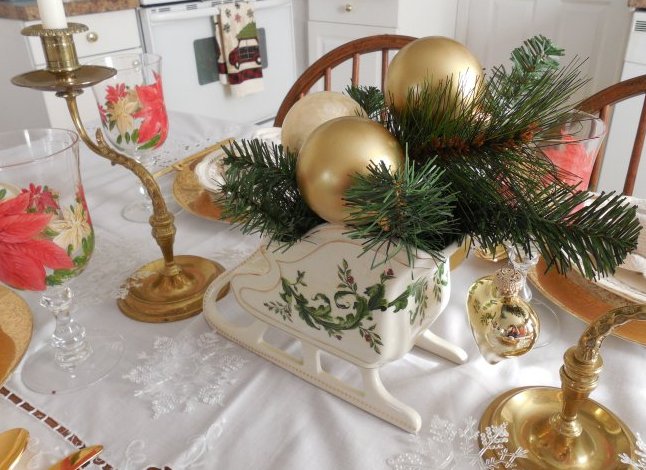
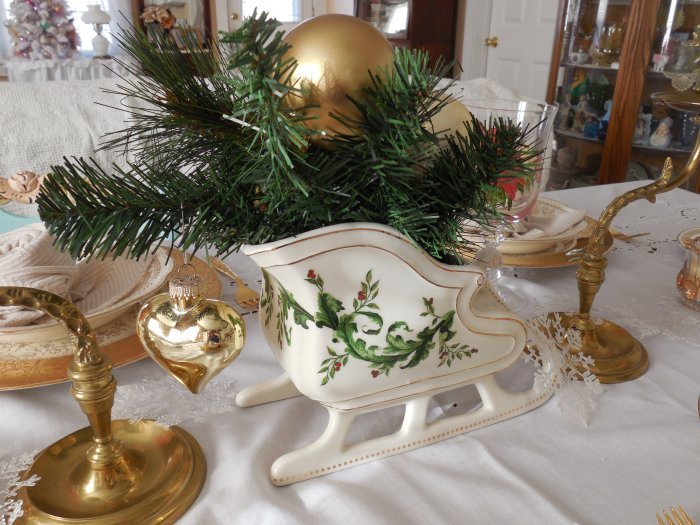
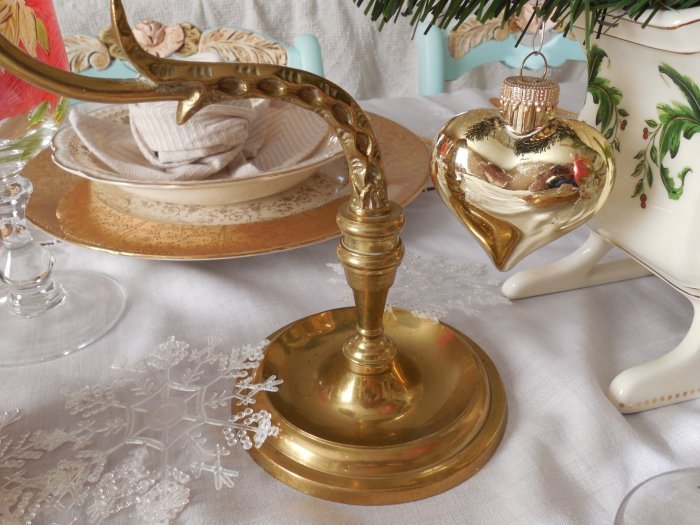
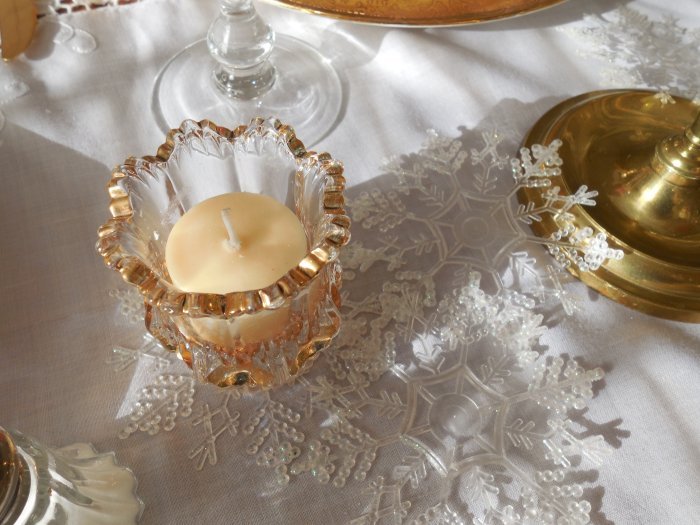
For our centerpiece, again we are using inexpensive and thrifted items – the arrangement consists of a pretty FTD ivory sleigh with gold accents, a pair of interesting counter-weighted brass candlesticks, and two votive holders (actually toothpick holders) that are antique Early American Pattern Glass (EAPG – the predecessor of Depression Glass). Filler items include faux greenery and ornaments from my stash, and pretty plastic snowflake ornaments from Dollar Tree.
I love how this tablescape brings in the shimmer and sparkle of Christmas, and yet also practically glows in warm gold when the sun hits it just right.

Here it is again all together –
And of course, the “put away shot” – just looking lovely while waiting to go back into the cupboards!
Here is a pin-able image if you would like to save this tablescape for future ideas!