This is another one of those easy Christmas craft DIY projects that – in all honesty – I’m embarrassed to call a tutorial. Let’s just call this one, “Here’s a simple idea, and a few tips for problem-solving as you go along.” So instead of boring you with the entire story of how this project came to be in what could be construed as (but most assuredly is not!) an attempt to pad a blog post, I’m going to start off with the actual how-to so you can get right to the task of making your own. What we’re making here are Christmas tree ornaments, using miniature tea things: a teacup Christmas tree!
- Buy miniature tea things from thrift stores.
- Tie ribbon through the handles.
- Hang them from the branches of your Christmas tree.
That’s it – that’s the tutorial!
At this point you’re either still reading because you are genuinely interested in how this idea came about and can’t wait to absorb my tips and tricks for making your ornaments OR… you’re already off making your own teacup ornaments and you don’t need me anymore! For those of you in the former category, I present the afore-mentioned backstory!
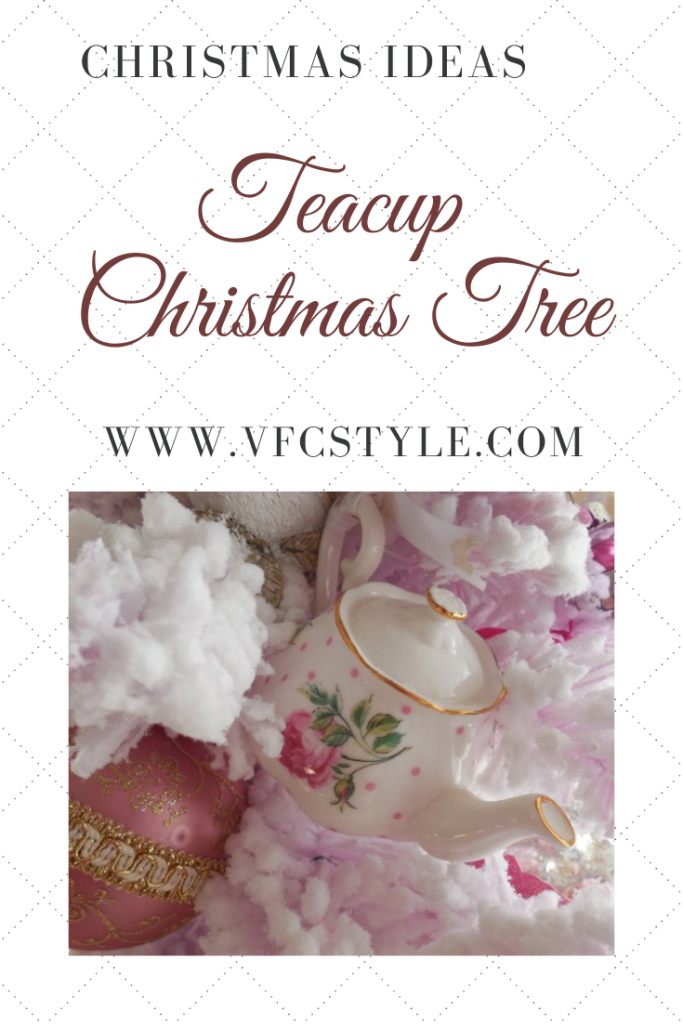
If you love – as author Jane Austen called them – tea things, there’s a way you can enjoy them at Christmas in addition to brewing your favorite holiday blend and taking out your prettiest Christmas china: you can use them, particularly in miniature, as ornaments on your Christmas tree!
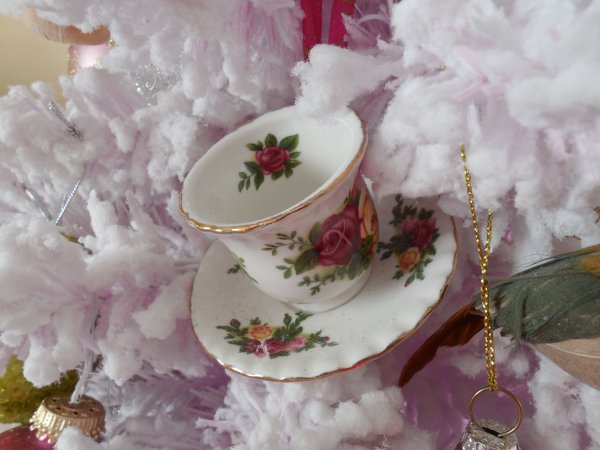
My “teacup Christmas tree” started – as so many collections do – with a single perfect item and became, well, a bit of an obsession. My daughter had given me a miniature teacup and saucer in my all-time favorite pattern, Old Country Roses, fashioned as a Christmas ornament. I placed it on the tree each year, front-and-center at my own eye level so I could easily admire it.
Now what’s that song by Madonna, the one from the movie Dick Tracy…? Oh yes –
One is fun, why not two?
And if you like two, you might as well have four,
And if you like four, why not a few… why not a slew
More!
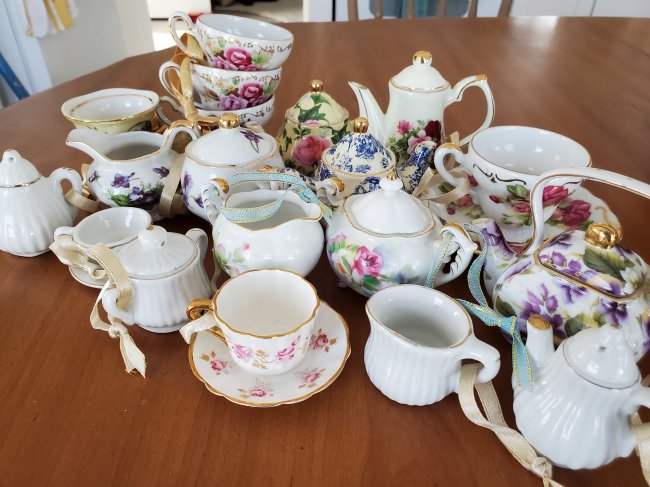
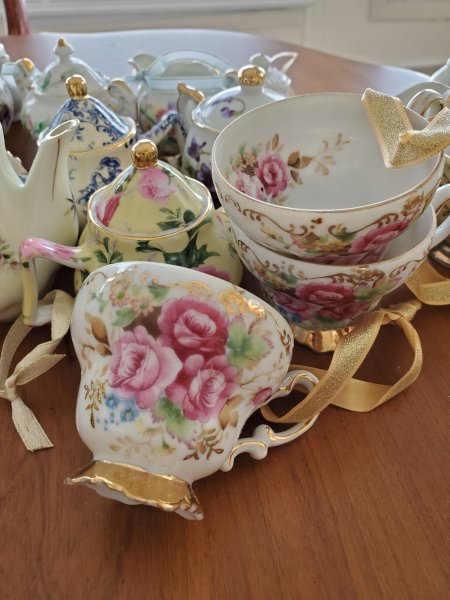
So one year it just occurred to me: more! Why not adorn an entire tree in teacups? Nevermind that I don’t even drink much tea (gasp!). It just seemed like the perfect easy Christmas craft, so off I went in search of miniature “tea things”… applied pretty ribbon to them and VOILA! Teacup Tree!
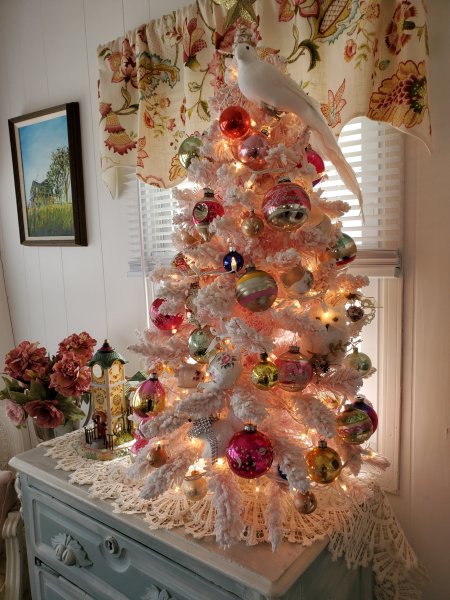
I did this for a couple of years, hanging tea things on my pink flocked Christmas tree. Then in 2020 – the year I needed “extra sparkle” at Christmastime because didn’t we all – I bought a new-to-me (thrifted) gold tinsel tree. I hung my original Old Country Roses teacup, but the pink flocked tree and the other tea ornaments sat in the closet for two years. For 2022 I decided to just bring out ALL THE TREES and so this year I will have Gold Sparkle Tree, Pink Flocked Tree, Bathroom tree, and Woodland Tree. A selection of teacup ornaments will once again make an appearance on the pink flocked tree.
Oh! Tips and tricks – yes there are a few things that will ensure success with your ornament-making. You are smart enough to identify (and solve!) these potential problems on your own through trial and error, but I offer them here in case they are helpful for you. Just think of them as points to ponder. Shortcuts. Hacks, if you will – although I actually hate that term. Here they are:
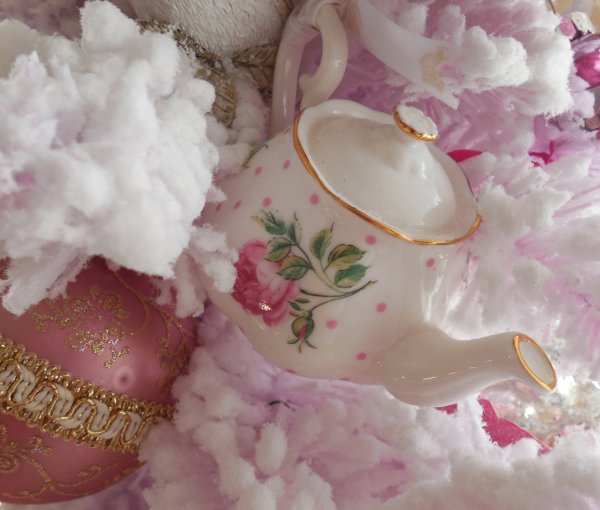
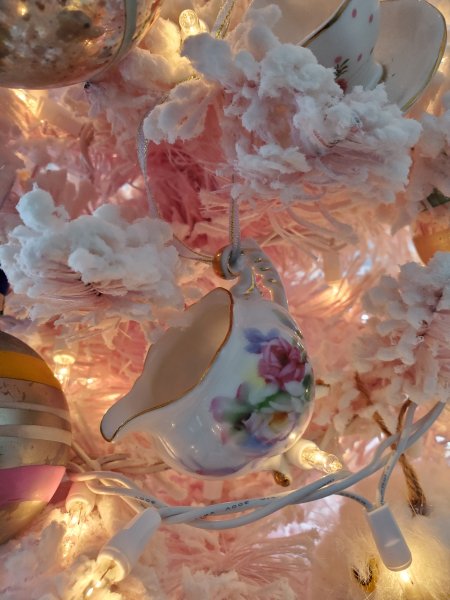
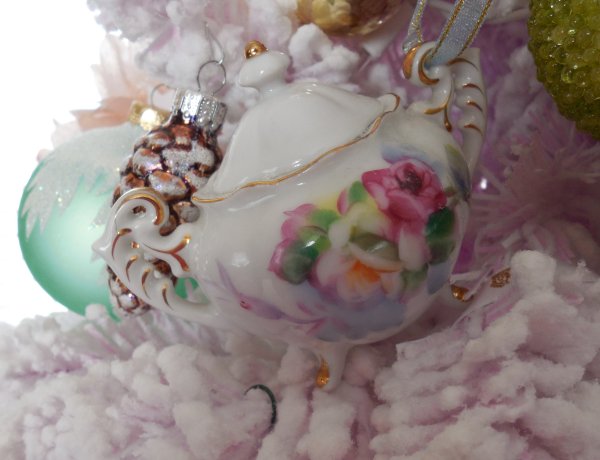
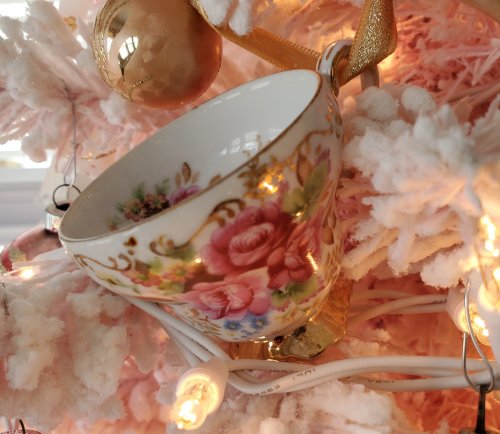
Select miniature and/or lightweight pieces for your ornaments. Full-size teacups, unless you have a very large and sturdy tree, would just be too heavy. Lightweight demitasse cups could also work. The weight is the key.
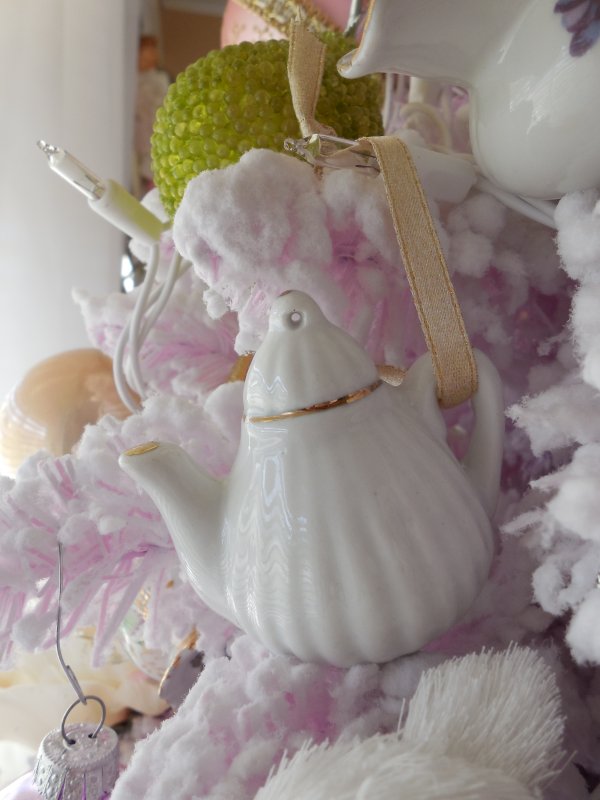
Use narrow ribbon, knotted and with the ends trimmed at an angle, for a prettier look. Thin gold cord could also work. Whatever you use, keep your loops on the small side unless you have very “full” branches on your tree.
Glue lids (on teapots and sugar bowls) permanently in place using your good ol’ E-6000 glue. If you have an actual 2-piece cup-and-saucer set, glue the cup to the saucer.
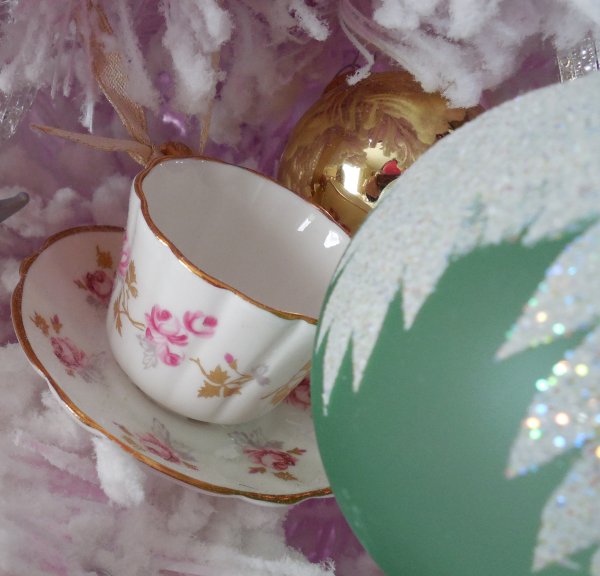
Run your ribbon through the handle of the item but keep in mind that the piece is going to find its natural center of gravity. You could end up with teacups hanging pretty much straight sideways, which looks a little odd. It’s okay to glue the ribbon in a spot along the handle if it helps the piece hang at an aesthetically pleasing angle.
The pieces are going to pull down the branches. It’s okay to hang the ribbon on a higher branch but then “nest” the actual ornament on a branch just below that, to prevent the piece from pulling the branch too far down. My flocked tree is perfect for this because the flocking gives each branch a bit of texture and the pieces don’t just easily “slide off.” This doesn’t work as well on the gold tinsel tree because the branches are a very smooth texture.
Hopefully this post inspires you to try making your own teacup Christmas tree! This year I set up my pink flocked tree in the kitchen and decorated it with my collection of vintage Shiny Brite ornaments plus several of the teacup ornaments. They’re hard to spot from a distance, but a nice surprise when you get up close.
It looks lovely – and now I’m wondering: might my Twining’s tea packets also be used as ornaments? Maybe if I add some glitter…
Here is an image to Pin in case you’d like to save this easy Christmas craft idea – a teacup tree! – for future inspiration!